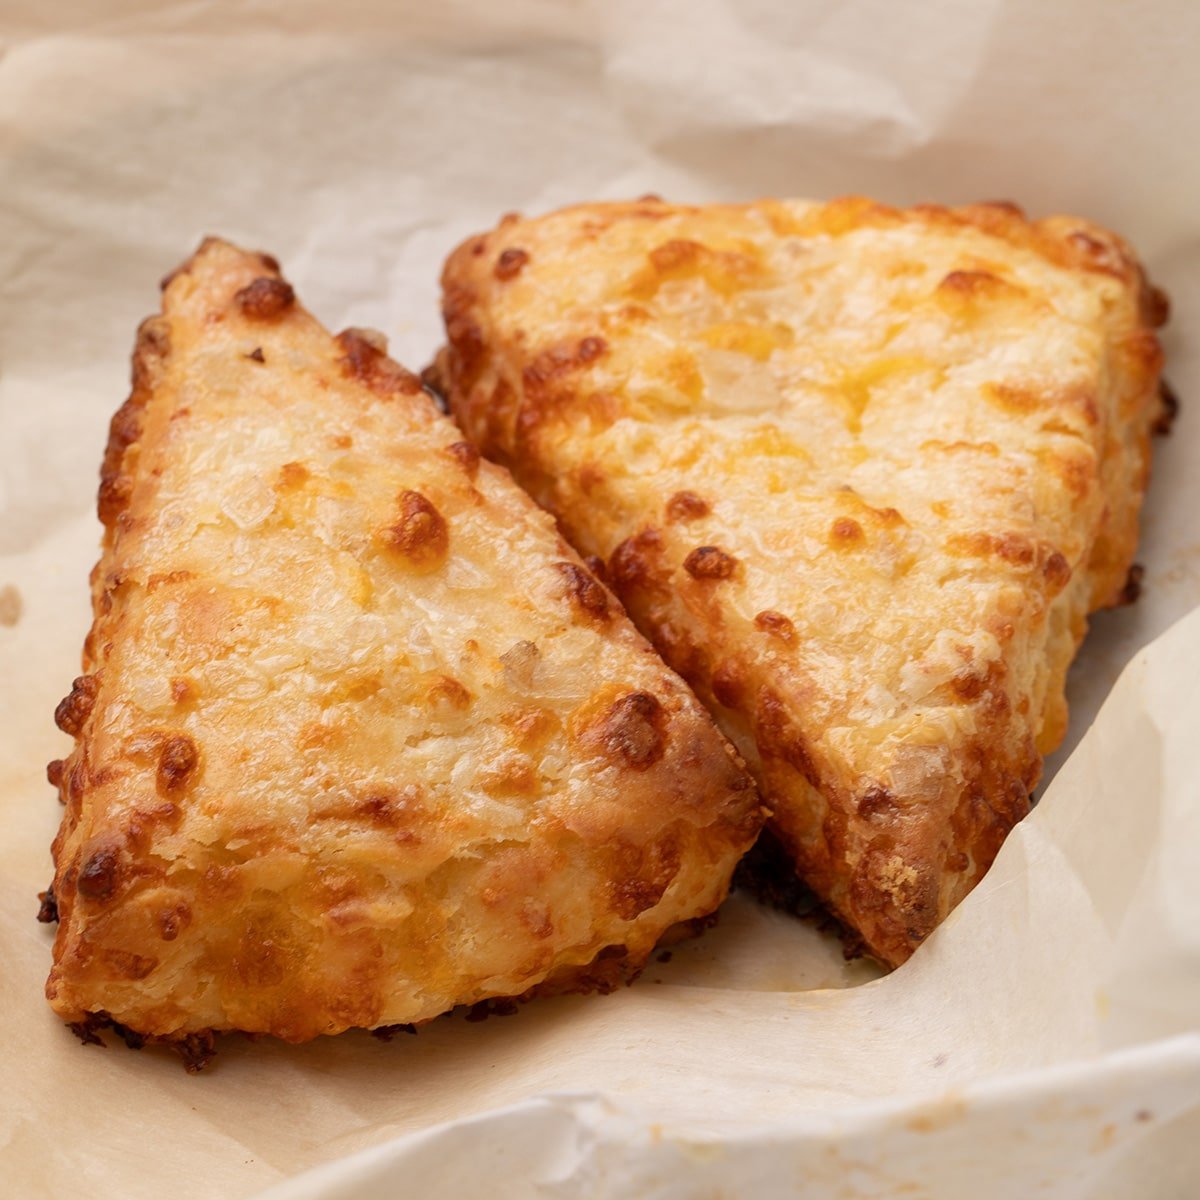
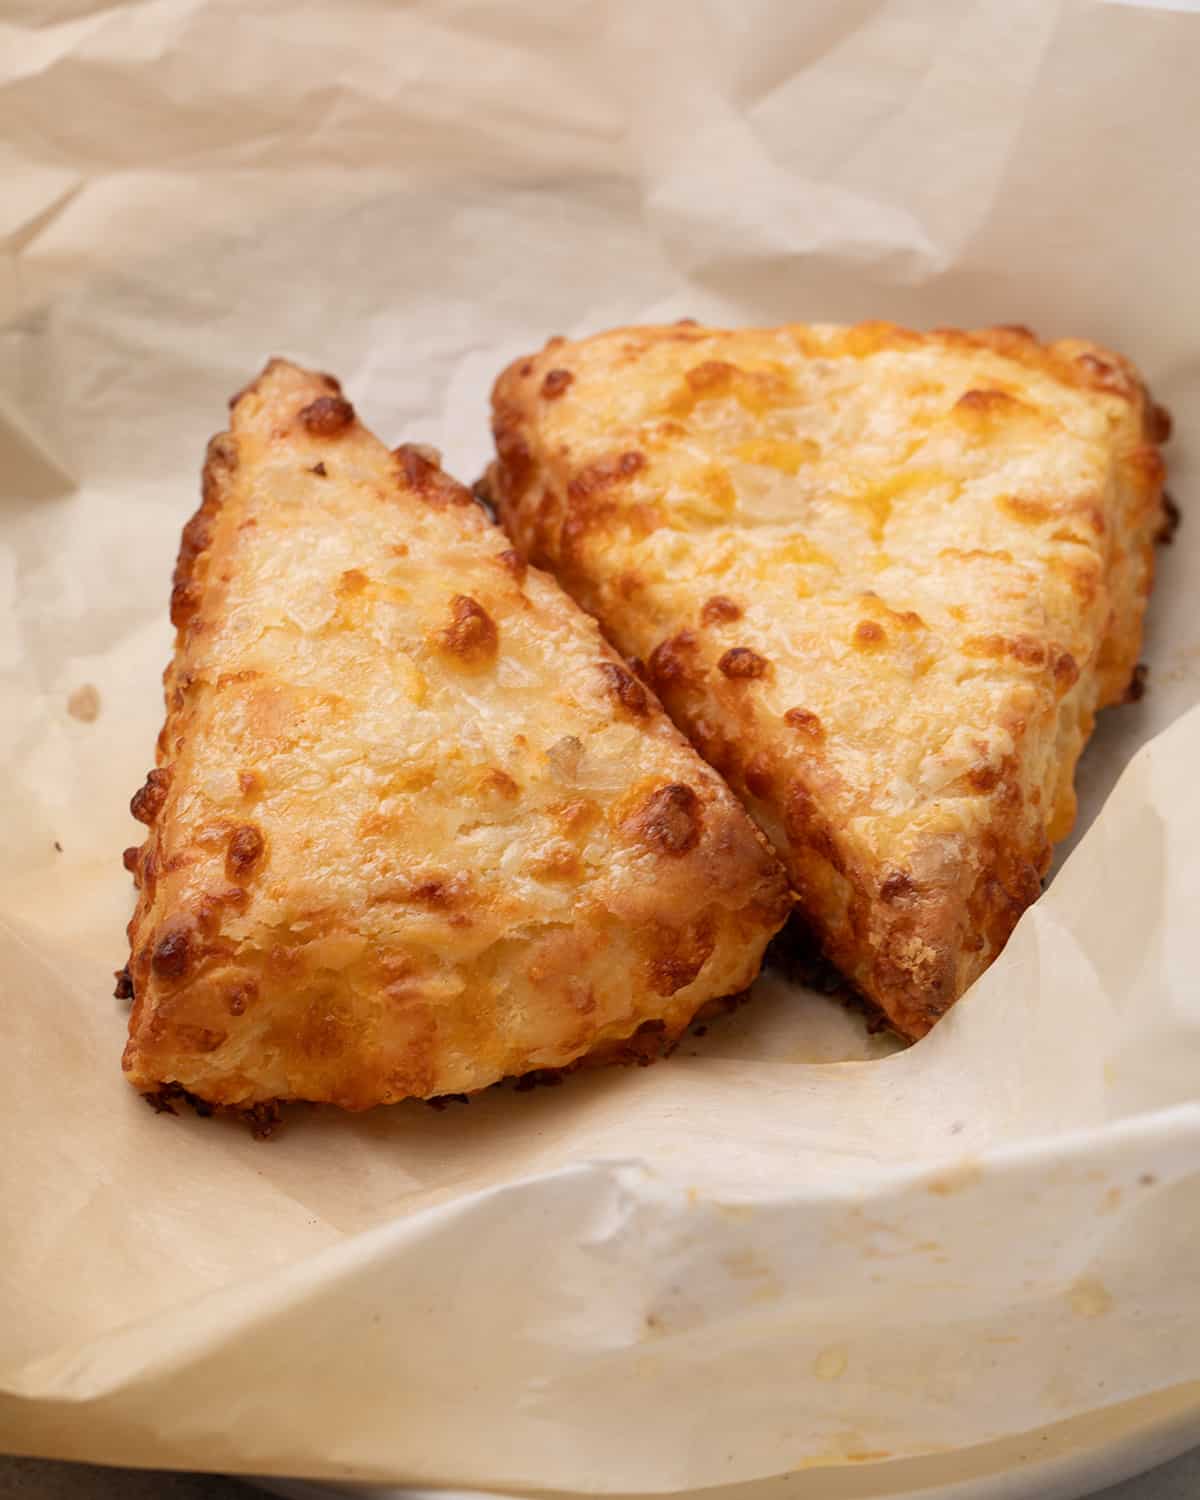
These gluten free cheese scones have tons of savory flavor, especially if you use good quality cheddar cheese, and miles of flaky layers. Plus, I’ve got a secret for keeping these egg-free and still having them rise super high!
Why this recipe works
These cheese scones are made like all our gluten free pastry recipes, using large pieces of cold butter flattened into floury shards. That’s what lets us handle the raw dough enough to roll and fold it in a process called lamination. If the butter melts at all, the pieces are large enough to firm back up during a final chill before baking. And cold chunks of butter expand in the oven to push those rolled and folded layers apart, creating those flaky layers.
Be sure to use freshly-grated cheddar in these scones so you don’t miss out on any of that umami flavor. Pre-shredded cheese is super convenient but has additives that make it less flavorful and drier. My local Trader Joe’s even now carries Tillamook brand cheese for a great price.
Recipe ingredients
Here are the ingredients you’ll need to make these scones, and the role each plays in recipe success:
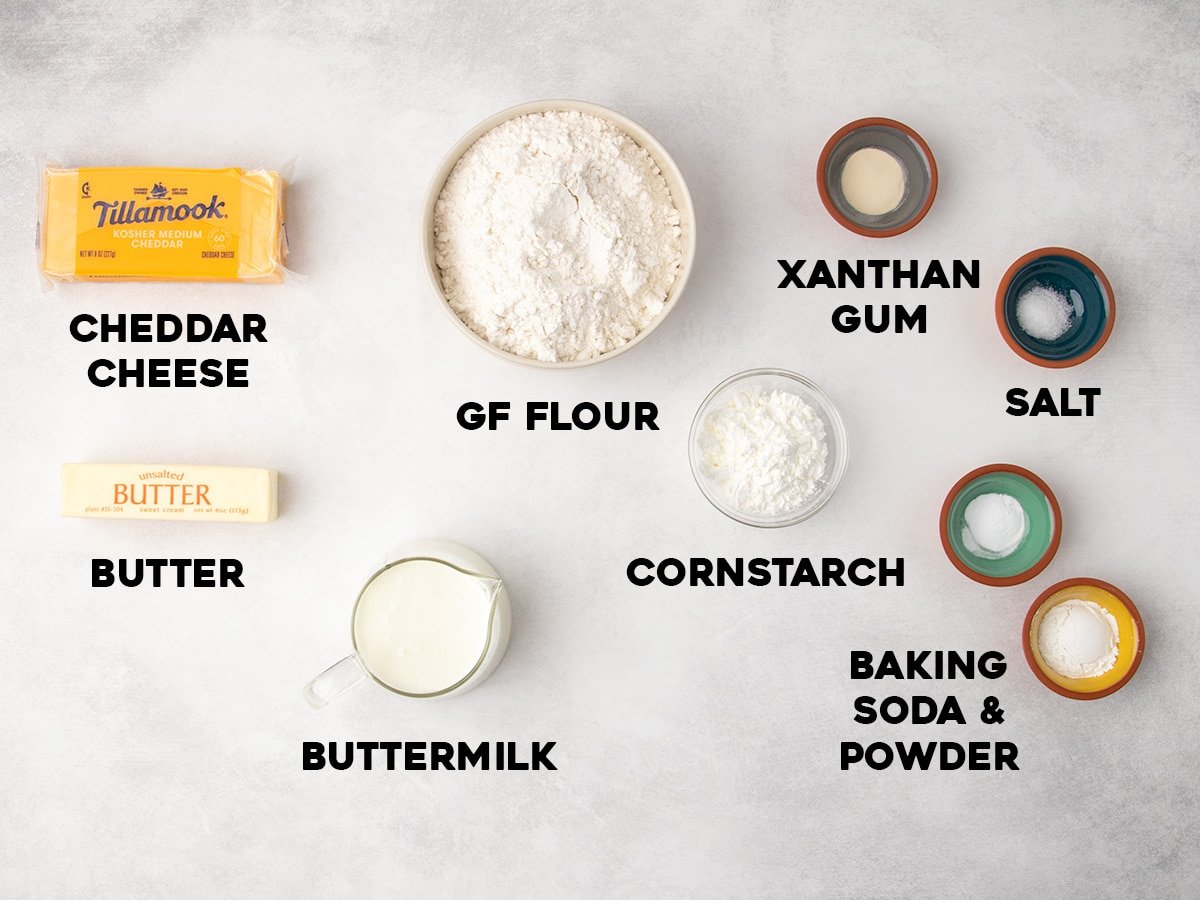
- All purpose gluten free flour: Use a well-balanced all purpose gluten free flour blend based on superfinely ground rice flour to provide enough structure to make crisp-tender scones that don’t fall apart. I like Better Batter’s original blend and Nicole’s Best multipurpose here. You can try Bob’s Red Mill’s 1-to-1 blend, but I can’t promise results.
- Xanthan gum: Binds the dough together and helps the scones rise tall in the oven. Even if your blend already contains xanthan gum, like Better Batter, add 3/4 teaspoon more for taller-rising, flakier scones. If you’re attempting to use Bob’s Red Mill, which contains even less gum, try adding an extra 1 1/4 teaspoons.
- Cornstarch: Adding cornstarch for a slightly starchier flour blend helps the scones turn crispy in the oven.
- Baking powder and baking soda: The powder makes the rise, and the soda helps them brown and reacts with the acid in the buttermilk.
- Salt: Brightens the other flavors, but we use a bit less here than usual since the cheese also adds salt.
- Butter: Adds buttery flavor and creates flakiness as the cold butter that lamination disperses throughout the dough expands in the oven.
- Cheddar cheese: Adds tons of savory, umami flavor to the pastries and textural contrast to the flakiness of the layers as it melts. Try to avoid using pre-shredded cheese, which contains anti-caking agents that make it drier. If you can’t avoid it, try reducing the cornstarch by half to 2 tablespoons (18 grams) and/or add more cold water, as necessary.
- Buttermilk: Adds gentle tangy flavor, brings the dough together, and reacts with baking soda to create rise. Cold water adds more moisture to any dry spots left behind after adding buttermilk to finish bringing the dough together.
How to make gluten free cheese scones (step by step photos)
Here’s a step by step overview with photos to help you make these scones in your own kitchen. The full recipe with ingredient amounts is in the recipe card.
1. Whisk the dry ingredients
The dough comes together easily in one bowl. Whisk together the gluten free flour blend, xanthan gum, cornstarch, baking soda and powder and salt to make sure everything is fully dispersed.
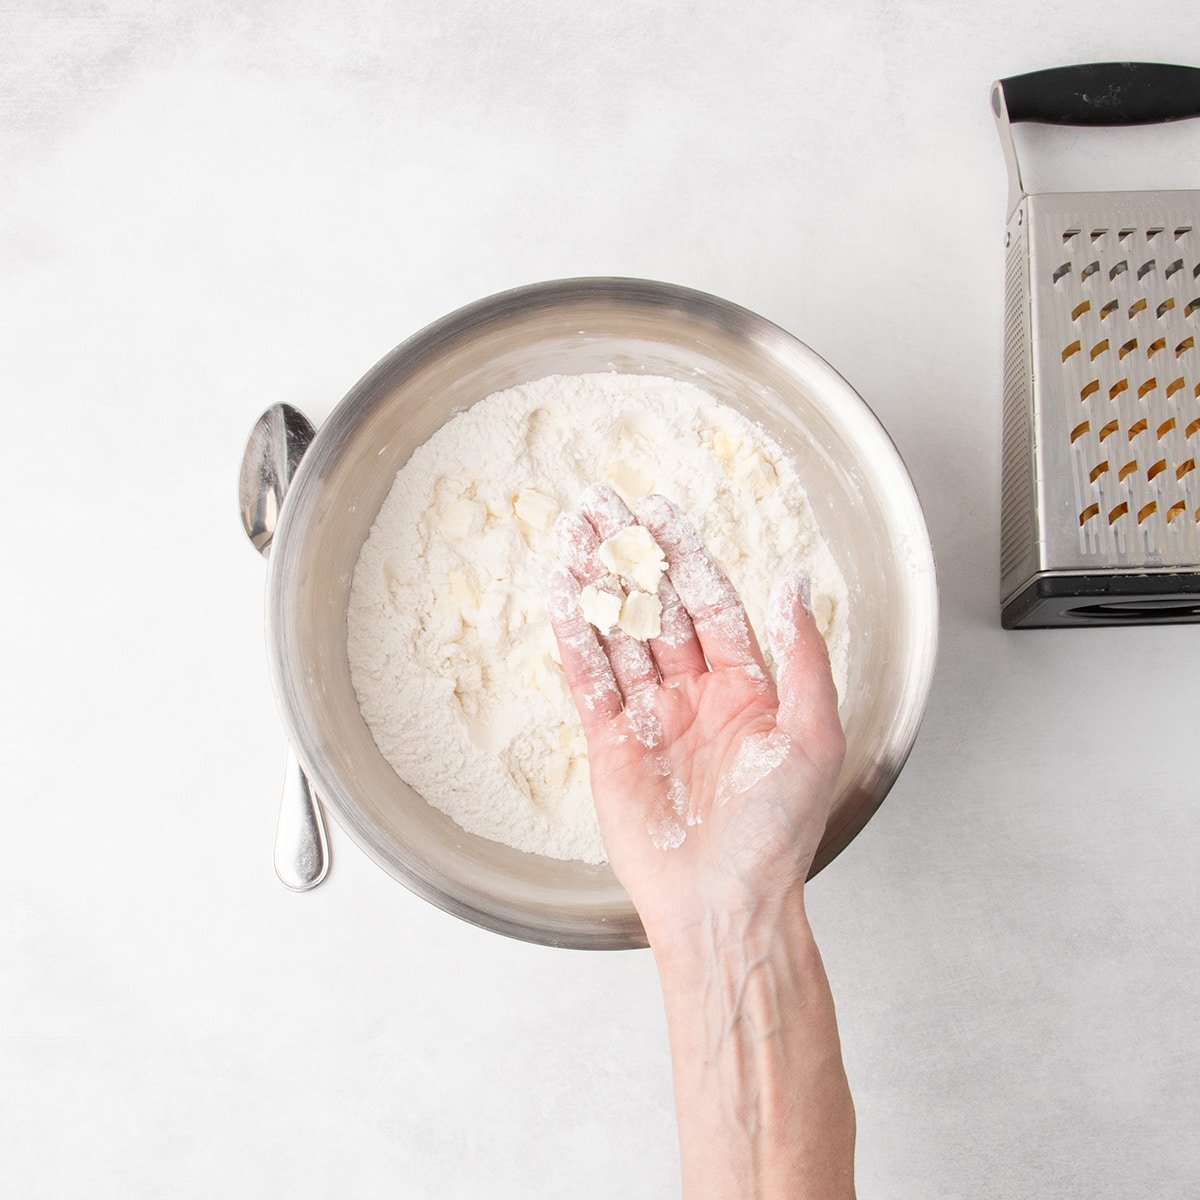
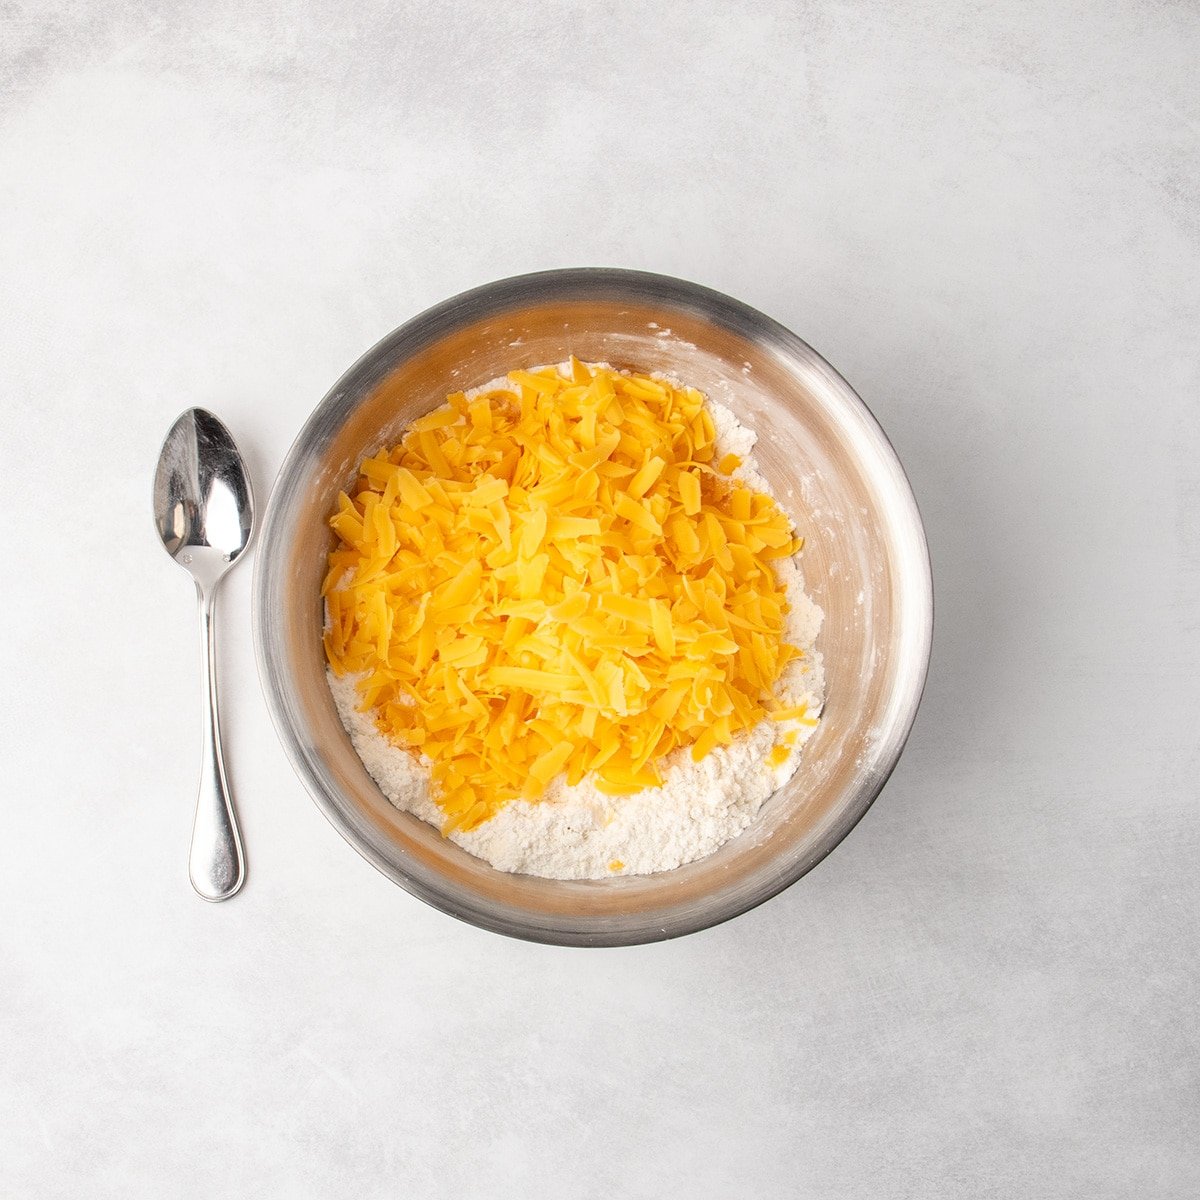
2. Add the butter and shredded cheese
Add the chopped, cold butter and press each piece between your floured thumb and forefinger to create flat shards. These pieces will be large enough not to melt as you handle the dough, and flat enough to fit in each layer of dough. Mix in the shredded cheese.
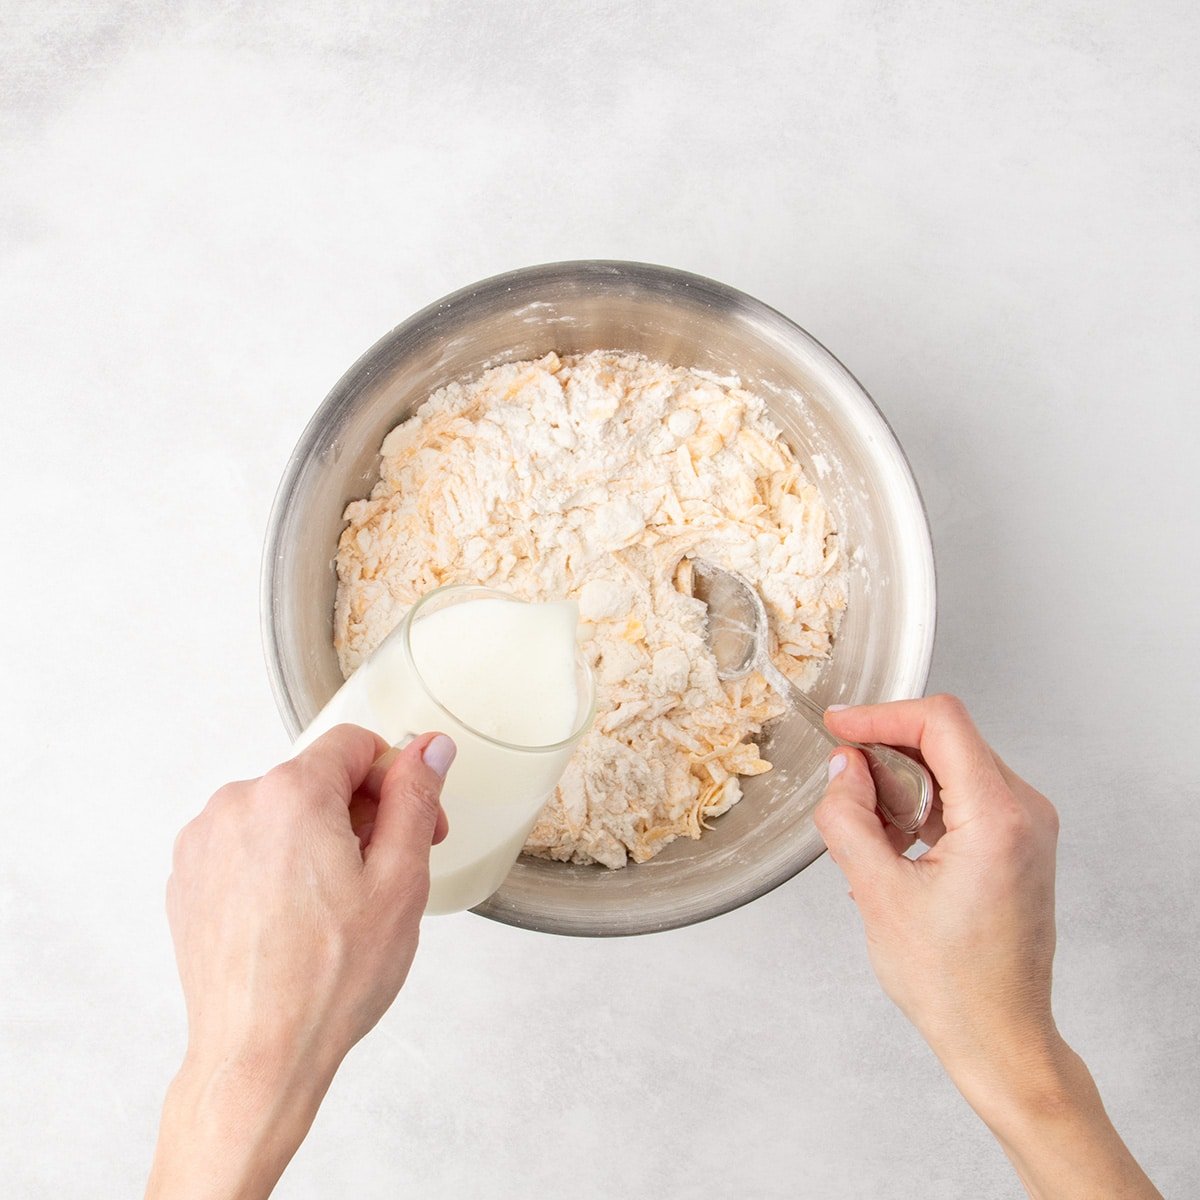
3. Add liquid
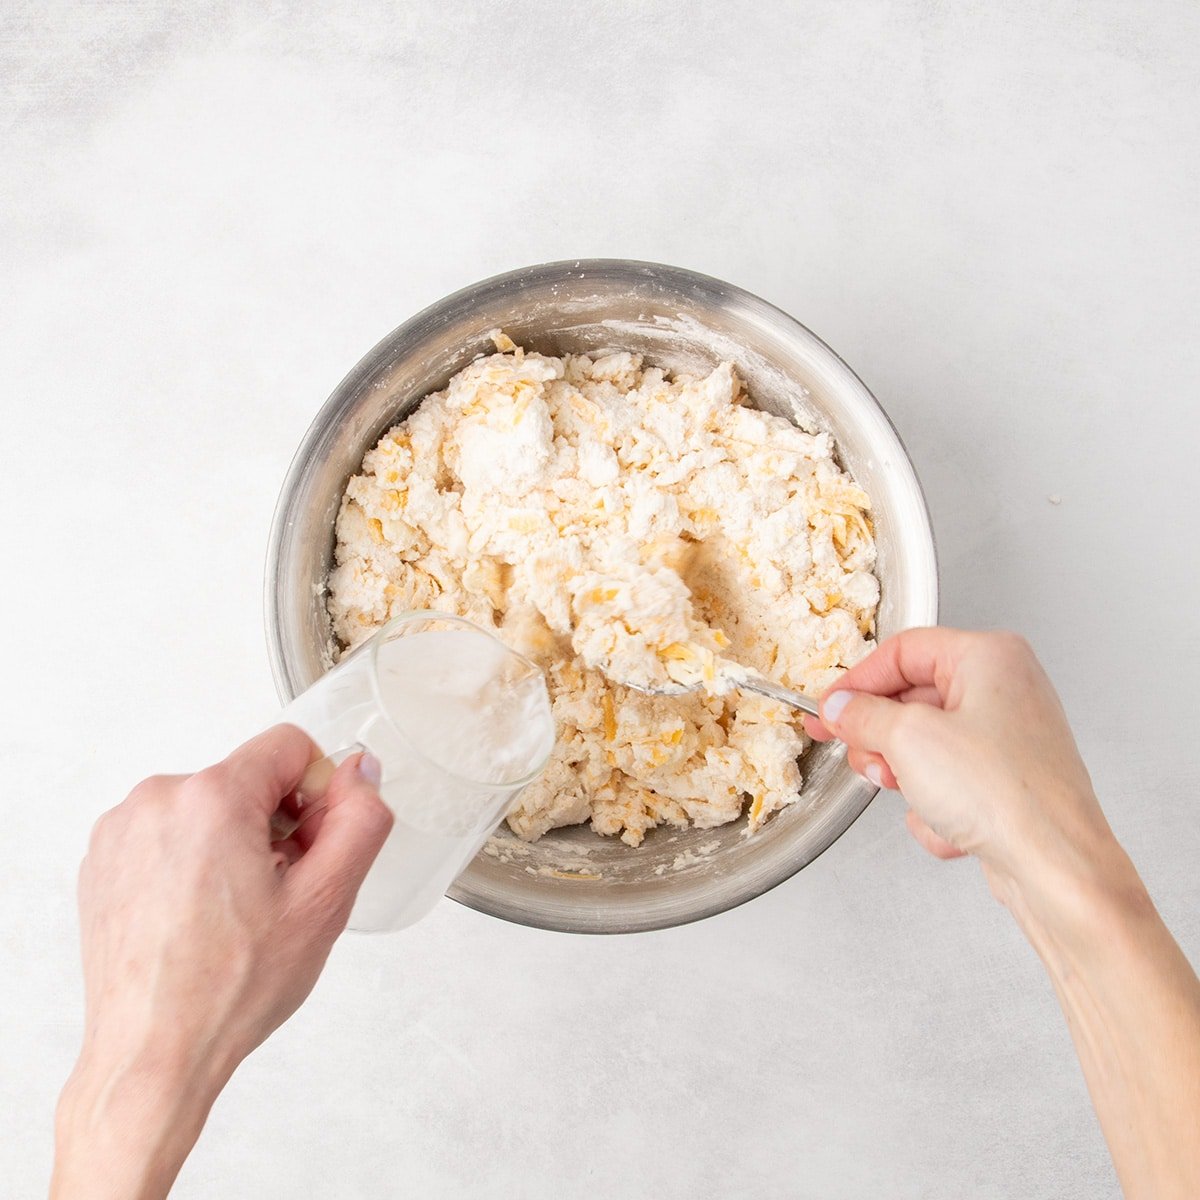
Mix in cold buttermilk and then cold water directly in any dry spots. This helps bring the dough together with enough liquid to moisten it without making it soggy and limp.
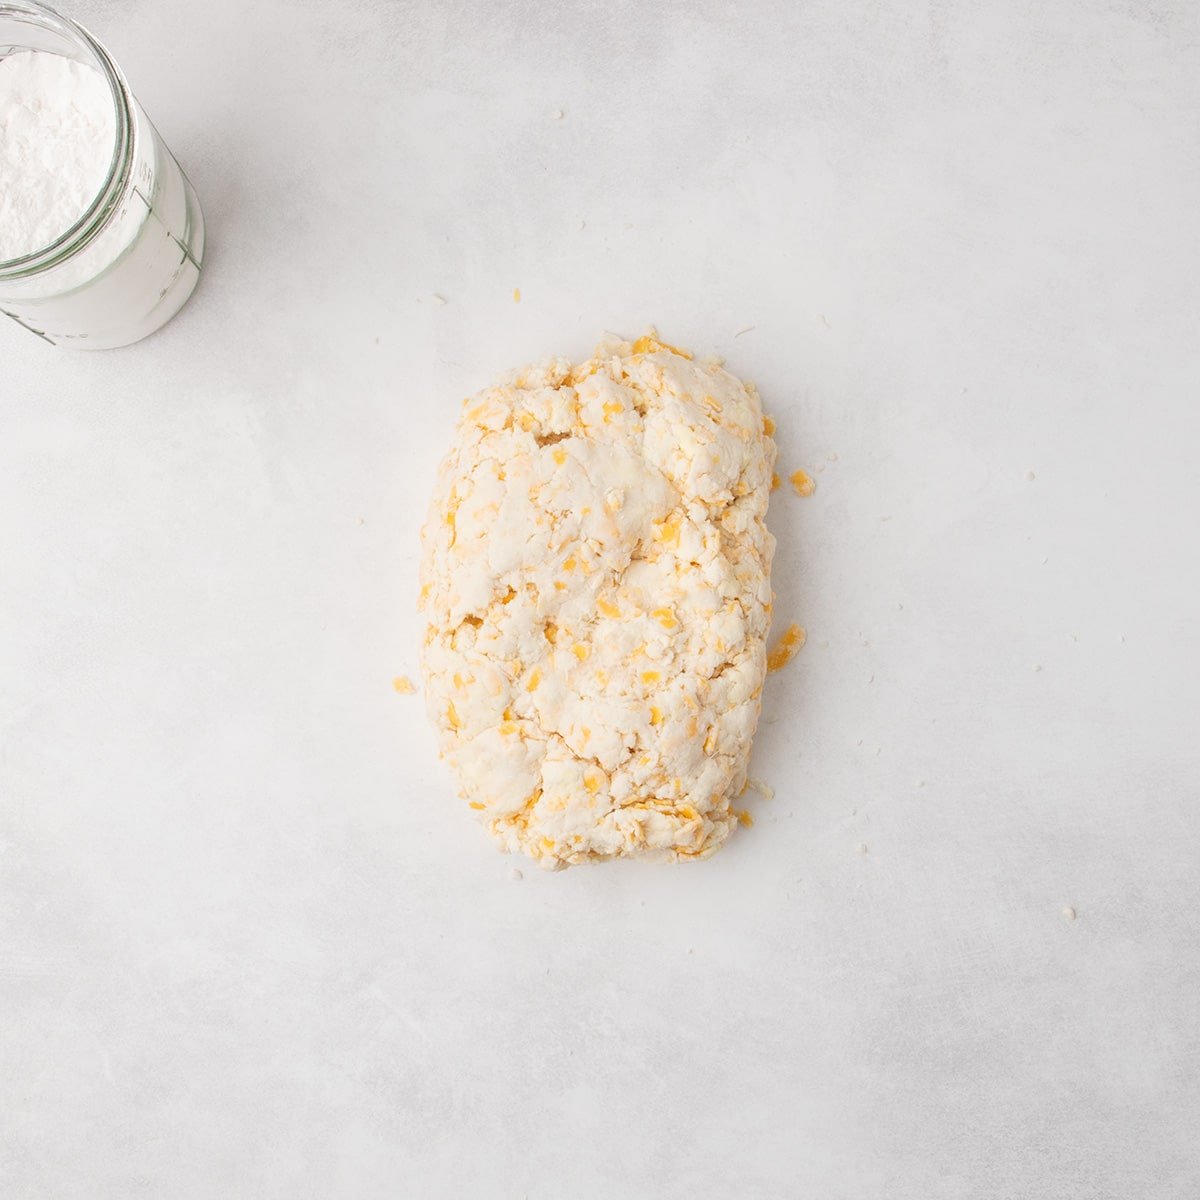
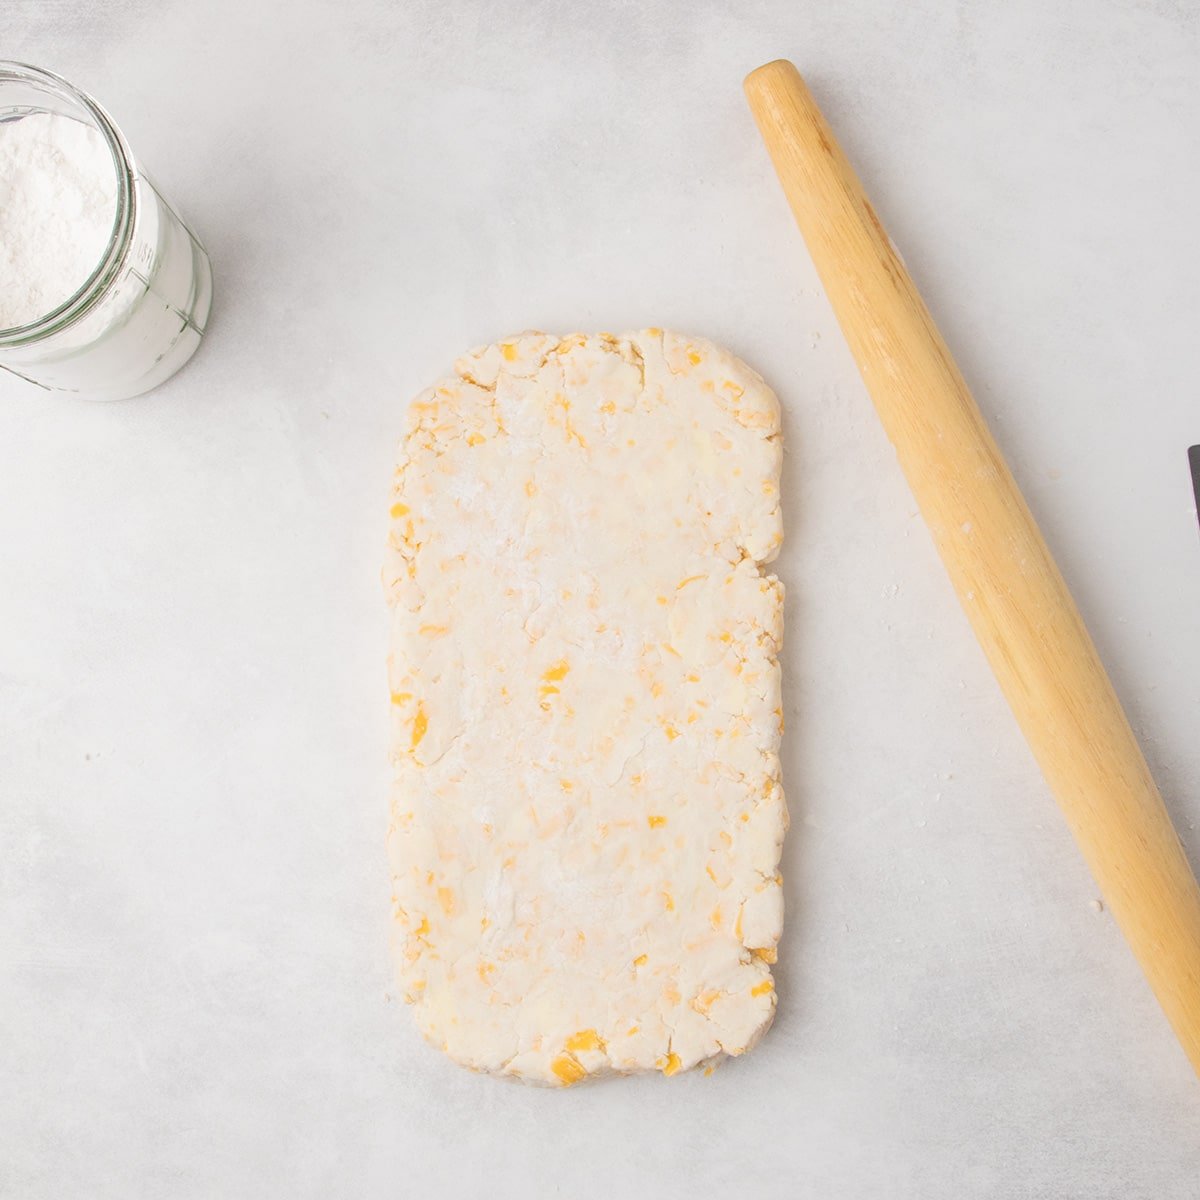
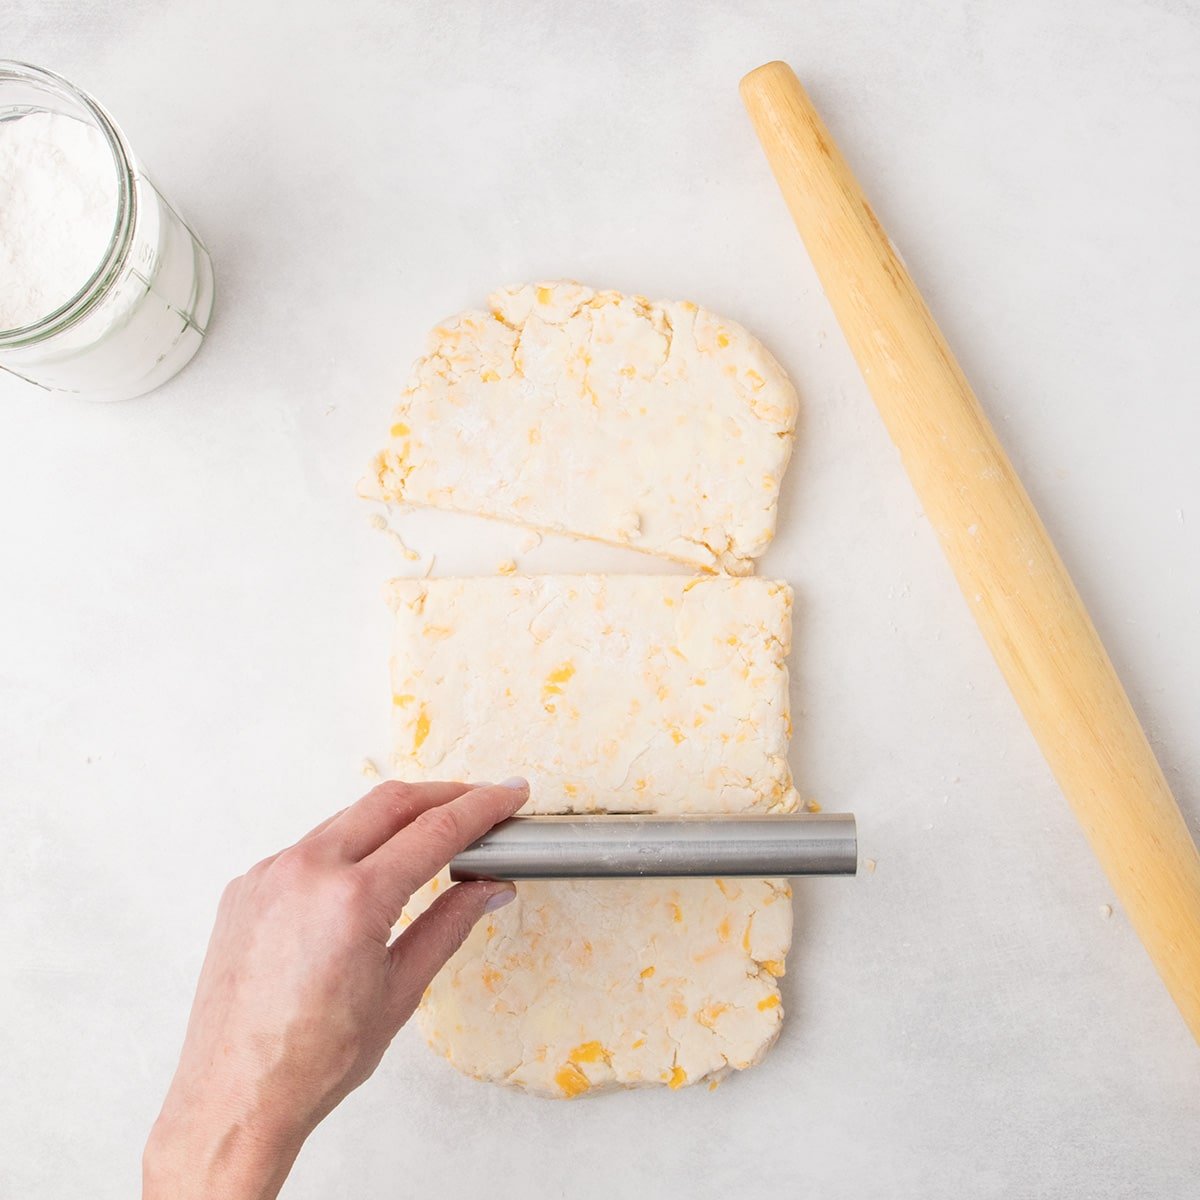
4. Roll and cut the dough (begin to laminate)
Place the dough on a lightly floured surface and press it quickly into a rough rectangle. Flour the top lightly and roll it into a rectangle that’s about 12-inches x 6-inches. Use a metal bench scraper or sharp knife to cut the dough across the width into 3 equal smaller rectangles.
This is the start of lamination, or the process of folding pieces of butter into dough in layers that multiply and accumulate, and what leads to flaky pastry layers.
5. Stack, roll and stack again (finish lamination)
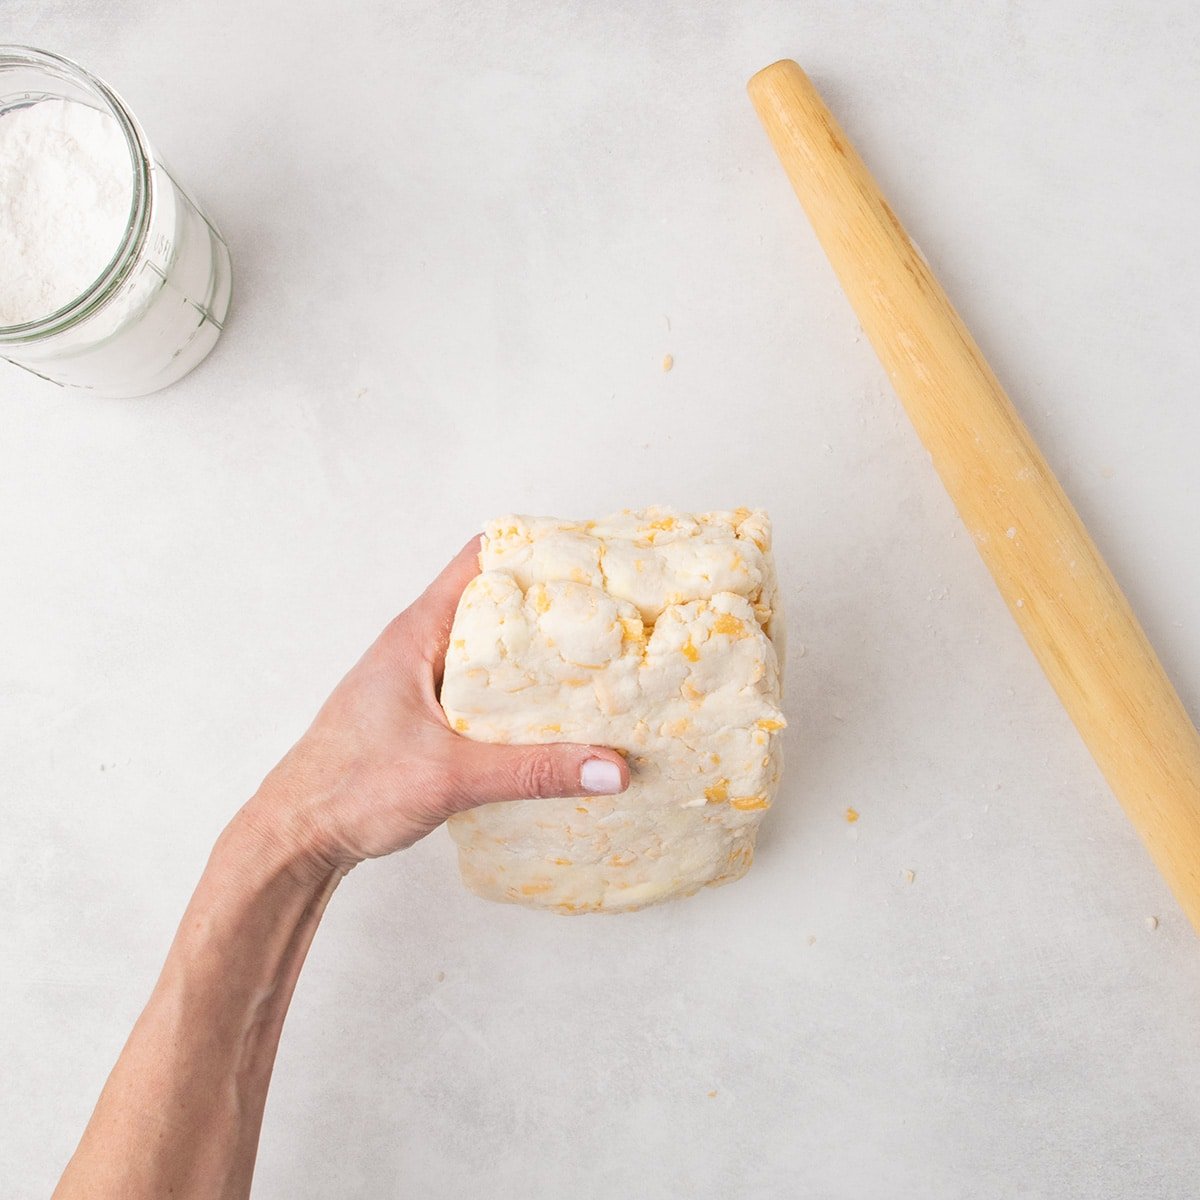
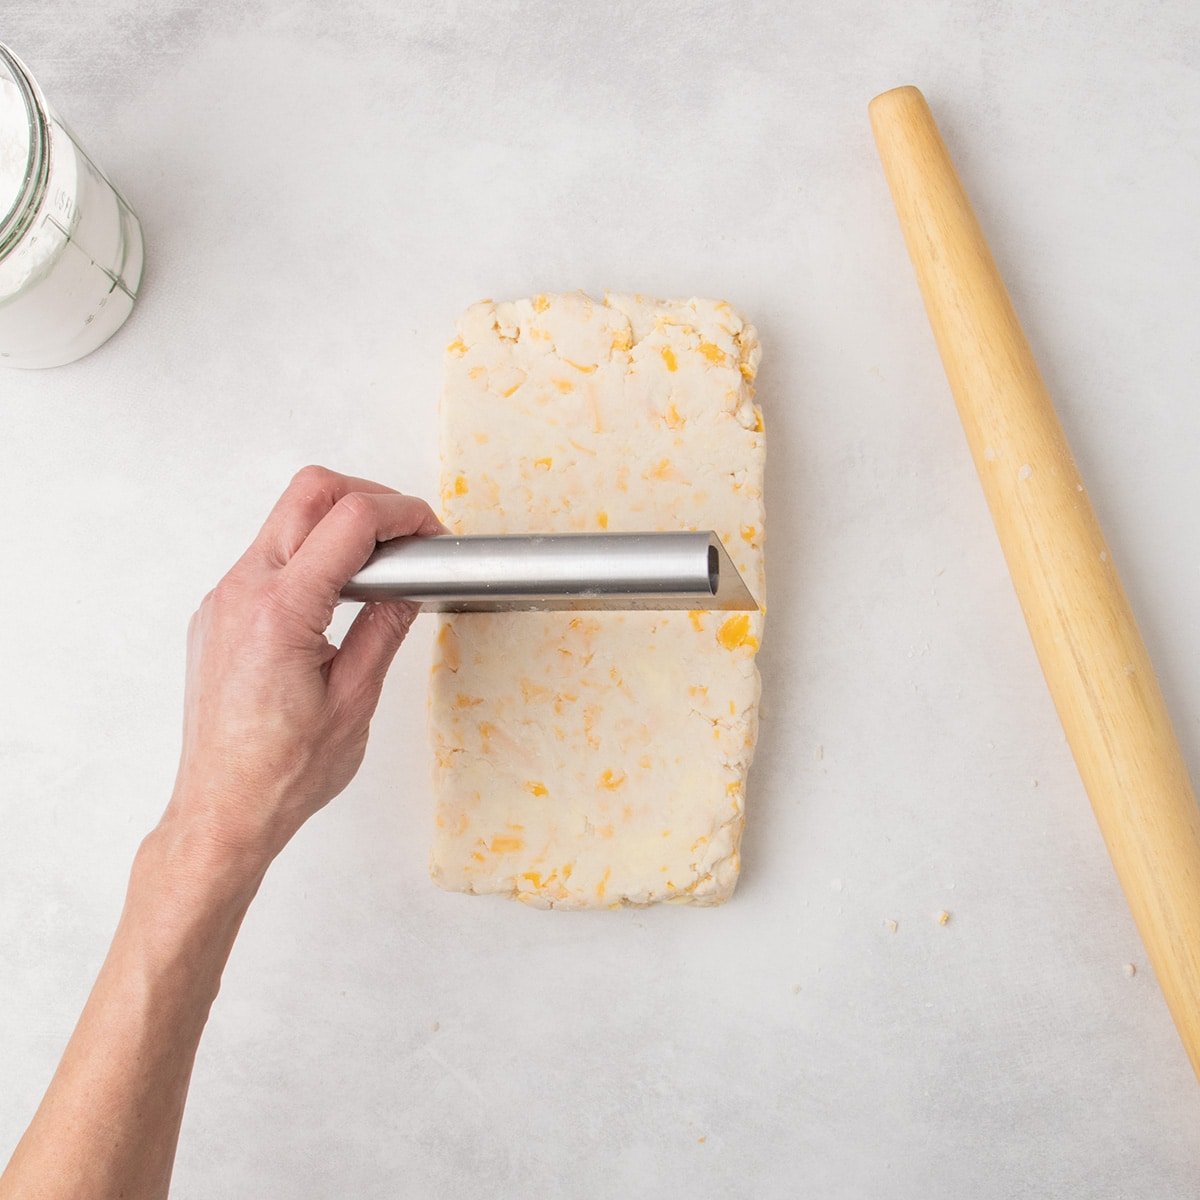
Stack the 3 small rectangles on top of one another, roll them out from one short side to another to create a larger rectangle similar in size to the first one, then slice the larger rectangle, but this time only in half.
You’ll have two medium-sizes 6-inch squares. Stack those and press to help them stick to one another. Lamination is complete.
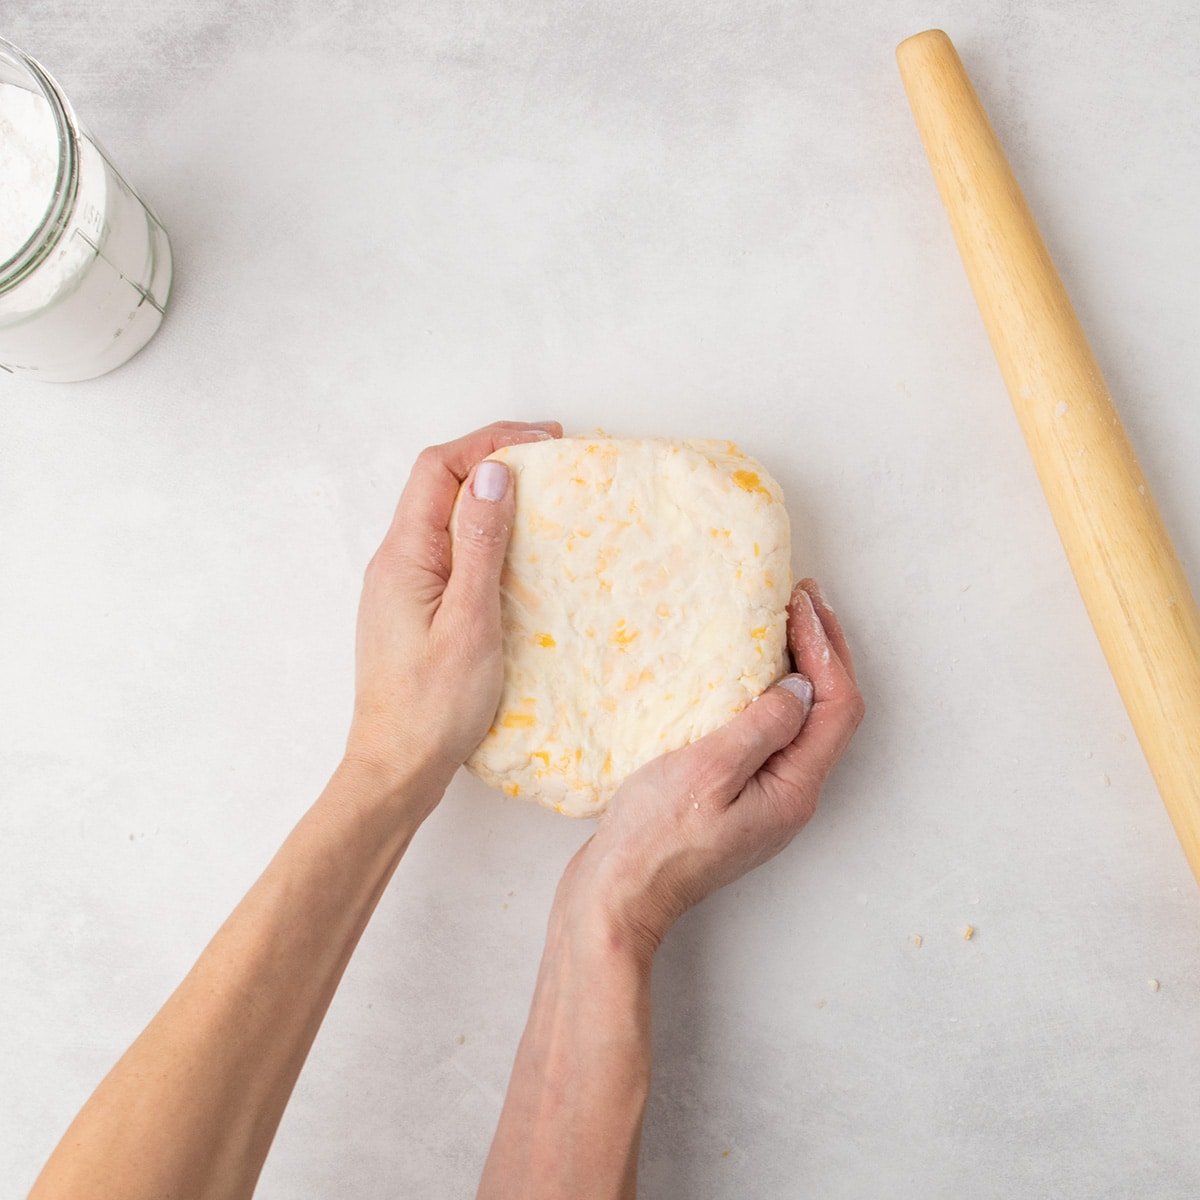
6. Shape and cut the raw scones
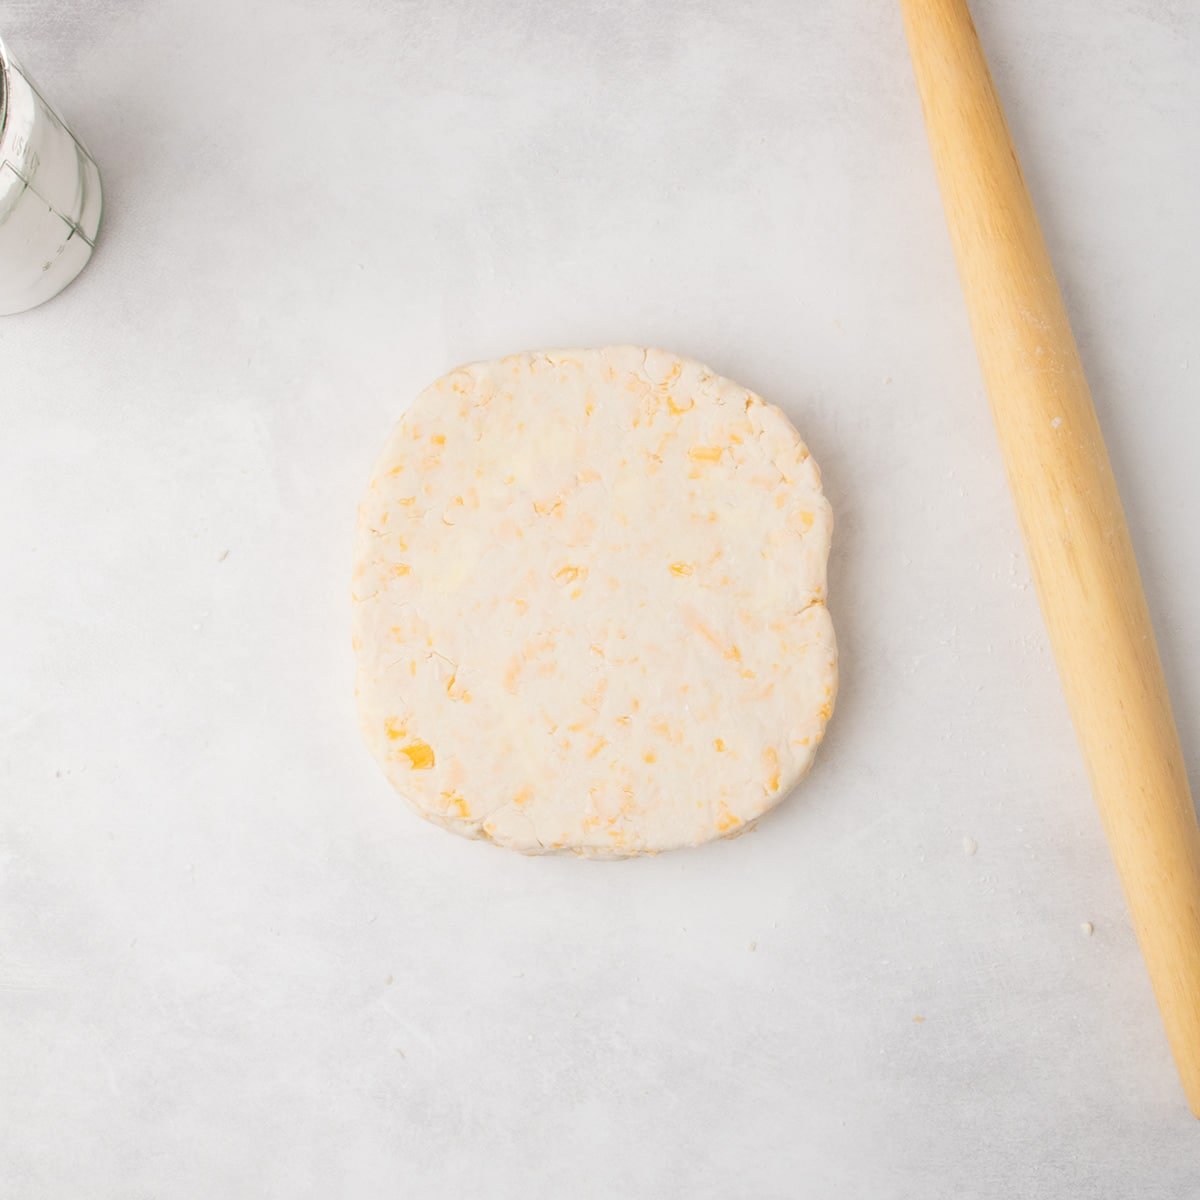
Press your palms against the corners of the square to round them, and help shape the square into a 6-inch round so the scones have rounded edges. Use the rolling pin to roll the round a bit thinner until it measures about 8-inches in diameter, so the scones aren’t too thick and short.
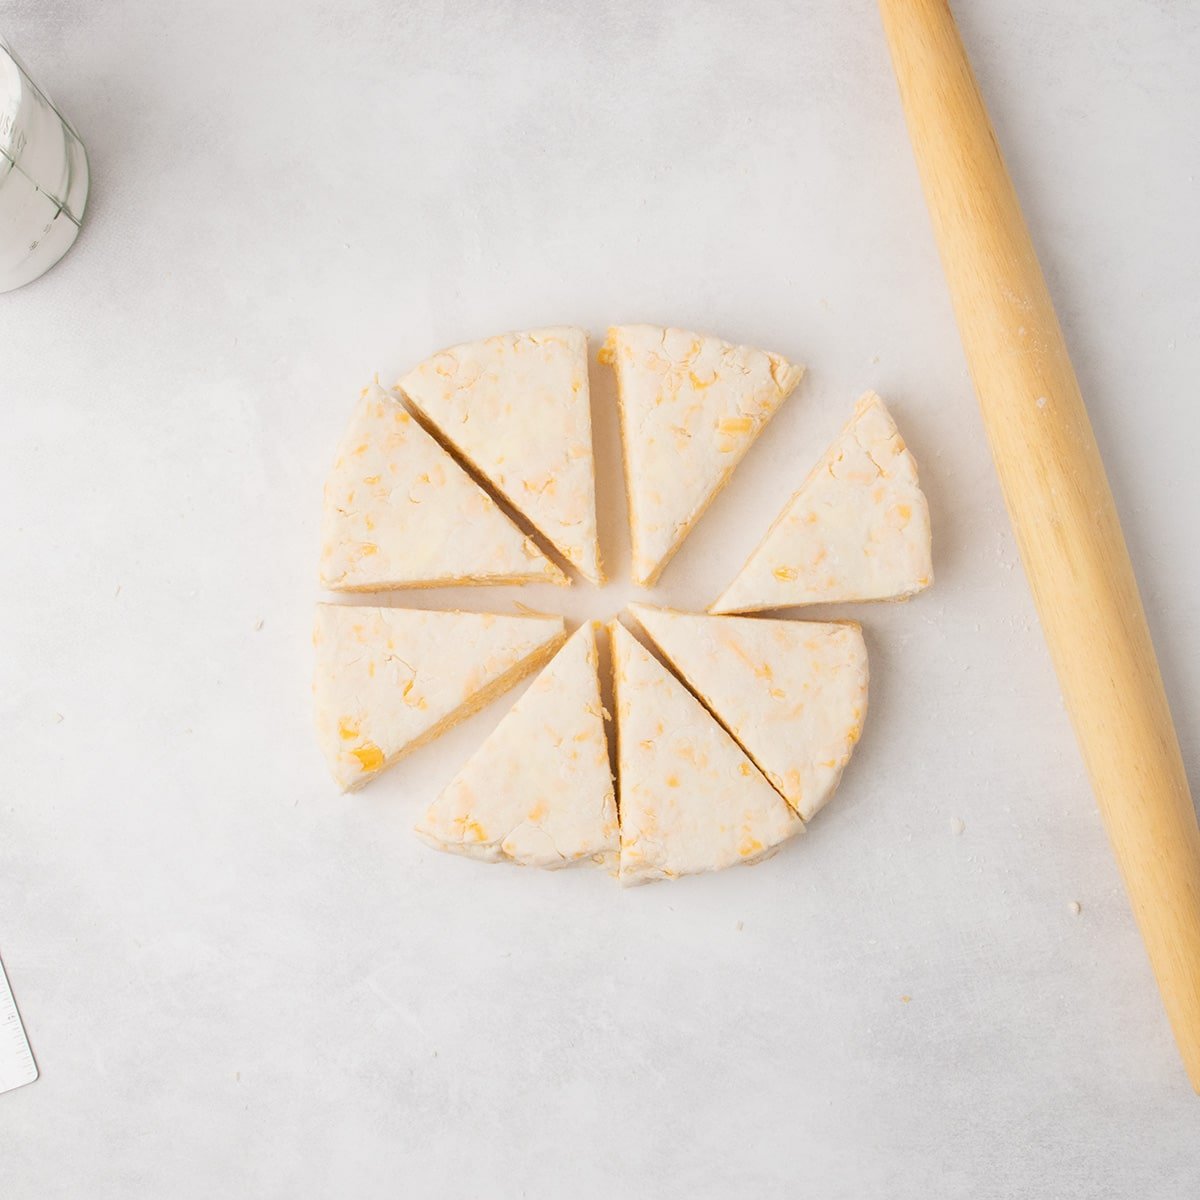
7. Cut out triangles
Use a metal bench scraper or large sharp knife to slice the round in half horizontally, then in half again vertically, creating 4 equal quarters. Slice each quarter in half, creating 8 triangles. Be sure to make each cut in one swift motion so all your edges are blunt, which helps the scones rise tall.
8. Chill the raw triangles
Place the raw triangles of dough on a flat surface and into the refrigerator until you’re sure they’re firm (15 to 30 minutes). In case any of the butter melted during handling, it will firm back up so it’s cold enough to expand in the oven, not just melt quickly.
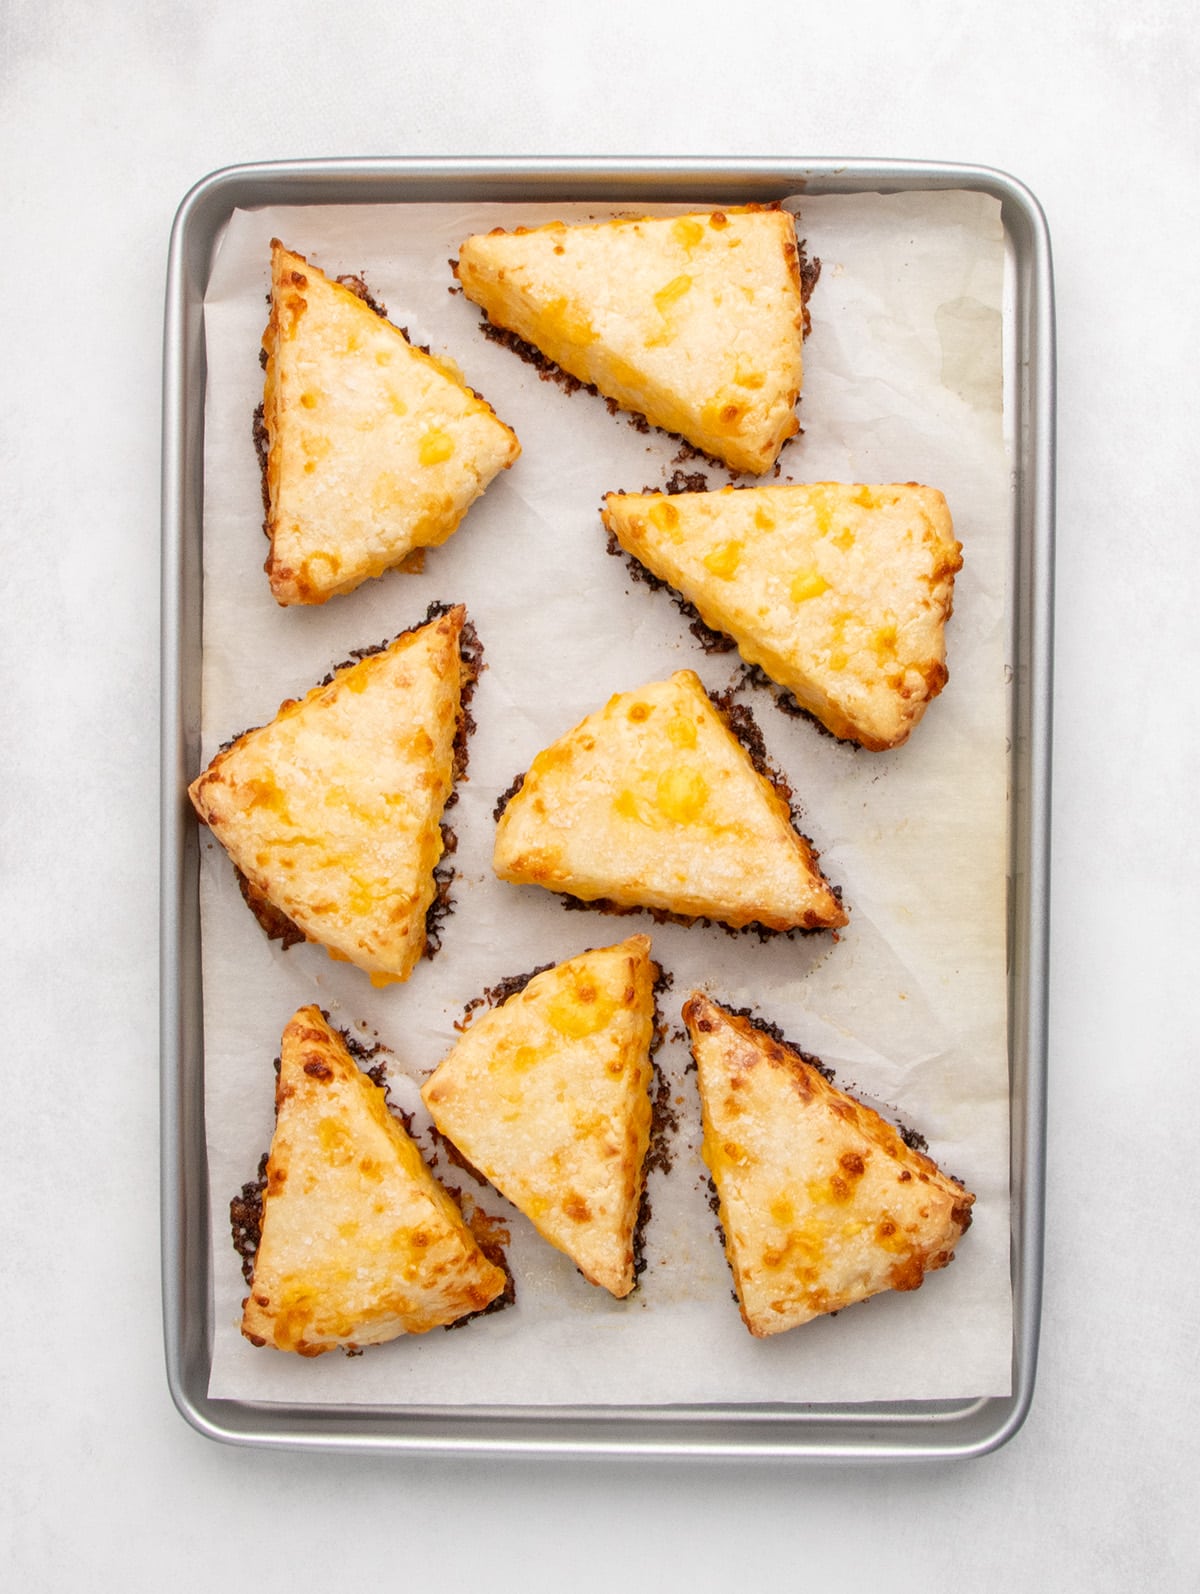
9. Top and bake the scones
Transfer the chilled raw scones to a lined baking sheet, spaced about 1-inch apart to allow room for them to expand. For a bit more flavor, brush the tops with some cream and sprinkle with coarse salt. Bake at 375°F for about 20 minutes, or until the scones are firm to the touch, fully risen, and have lacy, browned edges.

Expert tips
Make sure your butter is cold
To make your pastry light and flaky, your butter must be solid and very cold in stark contrast to the hot oven. Otherwise, it will all melt and leak out of the pastry right away, leaving behind tough, dry scones.
To keep the butter cold, the pieces must be large (no small pea-sized butter!), and the other ingredients like buttermilk and water that come in contact with it must be, too. Plus, remember that your hands are warm, so handle the dough as lightly as possible, flour everything lightly to create a barrier between your hands and the dough, and chill the dough before baking. Any melted butter should be large enough to firm back up.
Cut shapes with sharp edges
To help your pastry rise high in the oven, cut the triangles out of the round of dough with a very sharp edge. I like to use a metal bench scraper, but you can also use a large, sharp chef’s knife. Press your straight edge down to make the cuts in one swift motion. Never saw back and forth, which will compress the dough and prevent the highest rise in the oven.
Xanthan gum is used in most gluten free recipes as a binder to replace the gluten that we’ve eliminated from our baking. Like gluten, it’s activated in the oven to create a network that connects the other ingredients to one another, and then holds its shape during cooling.
Some gluten free scone recipes also include an egg for added support to help the pastries rise tall. If you add more xanthan gum than usual in gluten free pastry-baking, though, your scones still rise tall and you don’t need to introduce another allergen into the recipe.

Ingredient substitutions
If you need to make these scones dairy free, there’s a lot of dairy ingredients you’ll need to replace. For the cream on top, just skip it! Here are my suggestions of what to try for the other forms of dairy, but I’m afraid I can’t promise results since you’re replacing 1/3 of the ingredients in the recipe:
Butter substitute
In place of butter, I recommend trying block-style vegan butter like Melt and Miyoko’s Kitchen brands. Trader Joe’s also now sells a good block of vegan butter worth trying. You could also try using half Earth Balance buttery sticks and half Spectrum or Crisco brand butter-flavored shortening by weight.
Buttermilk substitute
If you don’t have buttermilk on hand, or you need to make this recipe dairy-free, try replacing the 1 1/8 cups buttermilk with about 1/2 cup (by volume) sour cream or Greek-style yogurt (dairy or nondairy), and the remaining 3/8 cup (by volume) milk (dairy or nondairy; for nondairy, use something that mimics the consistency of dairy milk, like a carton of coconut milk.
Cheese substitute
I like Violife cheddar-style nondairy cheese, but I’ve only seen it sold pre-shredded. You may need to add more cold water to bring the dough together, but add it sparingly. For more information on my favorite dairy free cheese, see my dairy free mac and cheese recipe.
Make the dough
-
In a large bowl, place the gluten free flour blend, xanthan gum, cornstarch, baking powder, and salt, and whisk to combine.
-
Add the diced butter, and toss to coat it in the dry ingredients. Flatten each piece between your fingers to create thin shards.
-
Add the shredded cheese, and toss to coat the shreds in the dry ingredients. Create a well in the center of the dry ingredients.
-
Add the cold buttermilk, and mix lightly to combine. The mixture should come together and everything should be just moistened in clumps.
-
If there are very crumbly bits, still, after mixing, add cold water by the teaspoon right on the dry parts. Mix again, and repeat as necessary.
Shape
-
Transfer the dough to a lightly floured surface. With clean, dry hands, lightly pat it into a rough rectangle. Sprinkle the top lightly with more flour.
-
Use a rolling pin to roll it out into a rectangle about 12-inches x 6-inches and about 1/2-inch thick.
-
Using a floured metal bench scraper or sharp knife, cut the dough into 3 equal 4-inch x 6-inch rectangles. Stack the rectangles on top of one another, and press down to help the dough stick.
-
Rotate the stack so a short end is facing you, roll the dough into a rectangle again, but this time about 10 inches x 5 inches. Slice in half, stack in a 5-inch square, and press the layers together to adhere.
-
Press in the corners to round them, and roll the dough into a round about 8 inches in diameter using your hands and a rolling pin. Flour the pin, surface, and dough lightly to prevent sticking.
-
Use a sharp knife or bench scraper to cut the round into 8 triangles by slicing it through the center at right angles, then slicing each resulting quarter into 2 triangles.
Chill the dough
-
Separate the triangles from one another, and place the raw scones on a cutting board or other small, flat portable surface.
-
Freeze the shaped scones for 15 to 30 minutes, or until firm. While the dough is chilling, preheat your oven to 375°F.
Bake the scones
-
Place the chilled scones on the prepared baking sheet about 1 inch apart from one another. Brush the tops with cream and sprinkle with coarse salt, if using.
-
Place the baking sheet in the center of the preheated oven. Bake until the scones are puffed and firm to the touch, and brown on the edges (18 to 20 minutes). Some of the cheese will have leaks out the sides and turned lacy and super crispy.
-
Remove the baking sheet from the oven. Allow the scones to set briefly on the baking sheet before serving.
For best results, use a high-quality all purpose gluten free flour blend with superfine rice flour. I recommend Better Batter original blend or Nicole’s Best. You can try using Bob’s Red Mill 1-to-1, add 1 1/4 teaspoons additional xanthan gum, but I haven’t tested this recipe with Bob’s so I can’t promise results.
For DIY options, see my all purpose gluten free flour blends guide.
About the cheese
If using preshredded cheese, reduce the cornstarch to 2 tablespoons (18 grams) and/or use more cold water.
Nutrition: Based on 8 scones without the optional cream or salt toppings.
Serving: 1scone | Calories: 442kcal | Carbohydrates: 48g | Protein: 10g | Fat: 22g | Saturated Fat: 13g | Polyunsaturated Fat: 1g | Monounsaturated Fat: 5g | Trans Fat: 0.5g | Cholesterol: 62mg | Sodium: 640mg | Potassium: 73mg | Fiber: 2g | Sugar: 2g | Vitamin A: 690IU | Calcium: 331mg | Iron: 0.2mg
Nutrition information is automatically calculated, so should only be used as an approximation.
Storage instructions
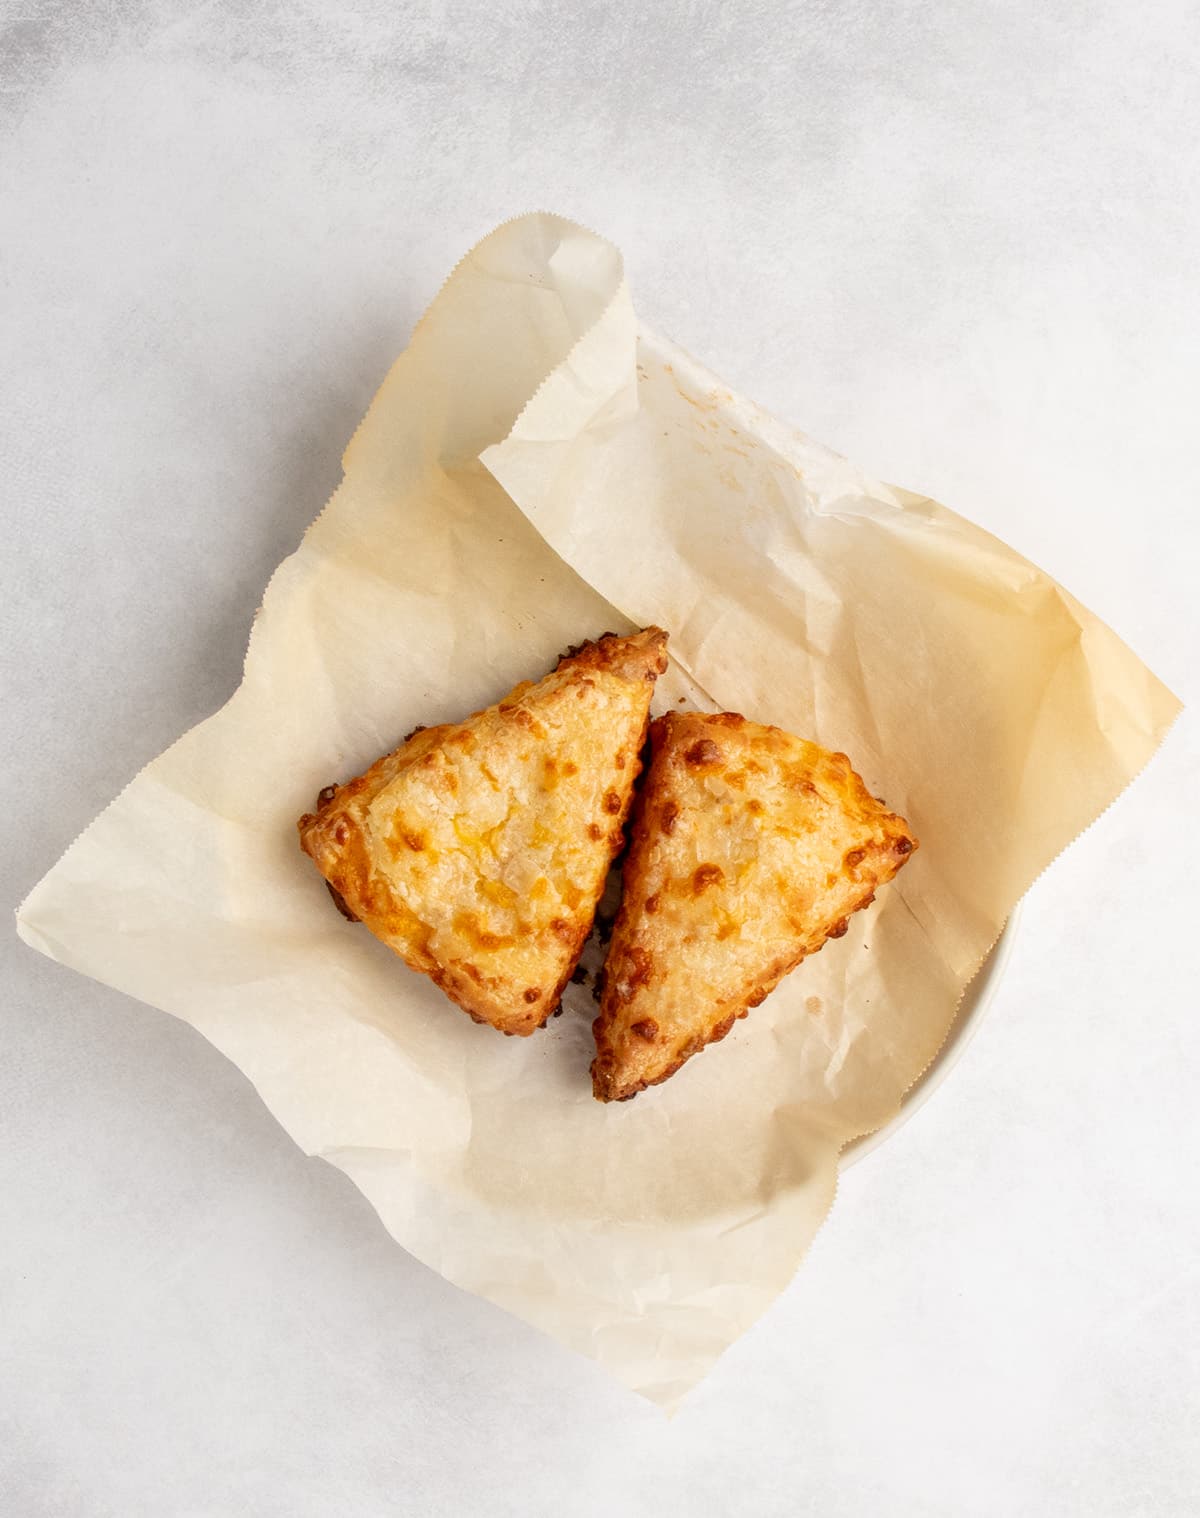
These scones are best served right after baking, but they will last for a couple days at room temperature wrapped individually. To refresh, sprinkle lightly with water and warm in a 300°F toaster oven.
For longer storage, these scones can be frozen raw and shaped, defrosted in the refrigerator, then baked. To freeze them after baking, just be sure they’ve cooled all the way to room temperature. Defrost them at room temperature or briefly in the microwave, then refresh as suggested above.
Source link