This post may contain references to products from one or more of our advertisers. Oh Sweet Basil may receive compensation when you click on links to such products.
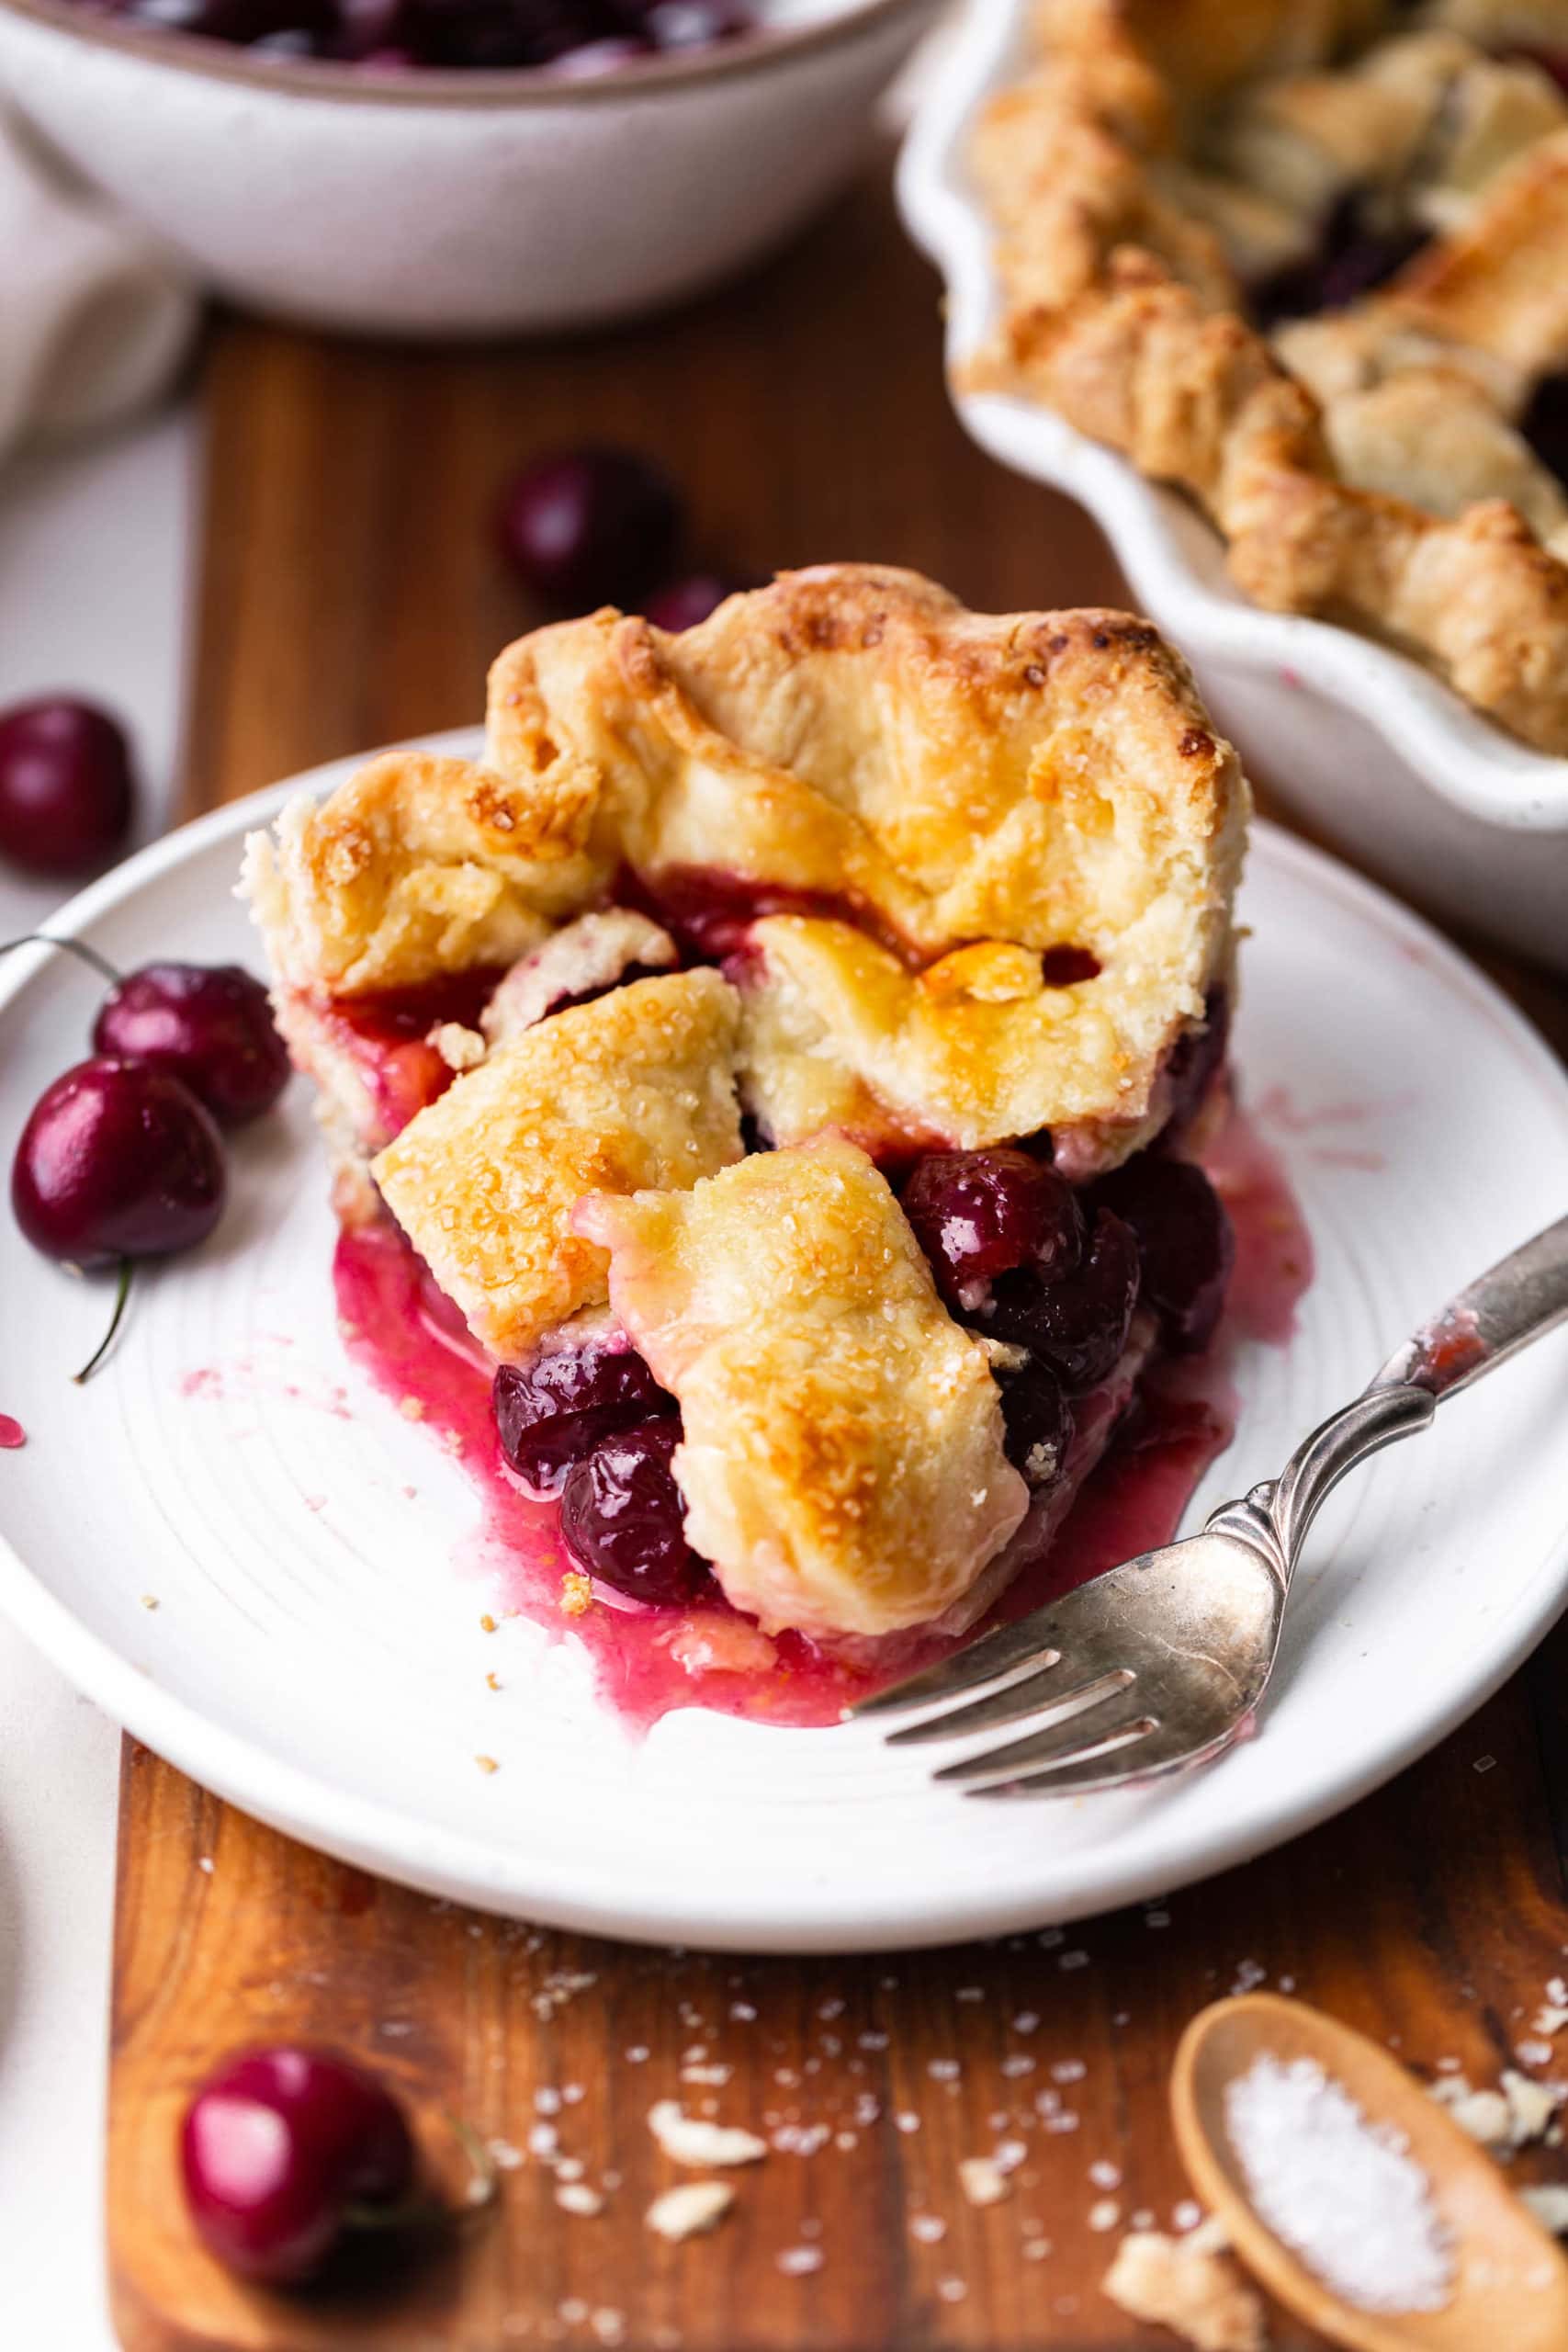
This cherry pie recipe is sweet, tart and bursting with juicy cherries, all tucked inside our flaky, buttery homemade pie crust. Made with fresh or frozen cherries and a hint of almond and lemon, it gives you that classic homemade cherry pie flavor any time of year—no canned pie filling needed.

I’ve said it before, but I am a pie girl through and through. Give me a slice of pie over almost any other dessert (except strawberry shortcake…my true love!). That flaky golden crust, juicy fruit filling and contrast between buttery, crisp pastry and gooey cherries? Dream. Come. True.
And while cherry pie may seem like a summer dessert, frozen cherries make this one perfect for Thanksgiving and Christmas too. You can even make the whole pie ahead of time and freeze it, which is exactly the kind of dessert I want when every inch of my kitchen is already spoken for.
Cherry Pie at a Glance
- Flavor: Sweet-tart cherries with almond and lemon
- Texture: Juicy filling + flaky buttery crust
- Cherries: Fresh or frozen
- Make Ahead: Yes
Why You’ll Love This Cherry Pie Recipe

- Completely homemade: No canned cherry pie filling here! The filling starts with real cherries and a handful of simple ingredients.
- Sweet but still tart: Lemon and almond extract bring out the cherry flavor without covering it up with sweetness.
- Flaky homemade crust: That golden, buttery lattice crust is almost as good as the filling. Almost.
- Make-ahead friendly: Cherry pie needs time to cool and set anyway, making it a great dessert to get out of the way before a holiday dinner.

Ingredients You’ll Need
You only need a handful of ingredients for homemade cherry pie. Here’s what really matters:
- Pie Crust: Our all-butter pie crust makes enough for the bottom and beautiful lattice top.
- Cherries: Tart cherries are our first choice, but sweet cherries work too. Fresh or frozen can both be used.
- Sugar: Sweetens the cherries. You may want to adjust it slightly depending on how tart your fruit is.
- Lemon: A little acidity brightens the filling and balances the sugar.
- Almond Extract: Just a small amount makes cherry flavor taste even more cherry-ish. It’s one of my favorite little secrets!
- EZ Gel or Cornstarch: Thickens all those cherry juices so you get a saucy filling instead of cherry soup.
- Egg + Milk: Whisked together for an egg wash that gives the crust its gorgeous golden finish.
- Sanding Sugar: Optional, but I love the sparkle and little crunch it adds to the lattice crust.
What Are the Best Cherries for Cherry Pie?
Tart or sour cherries are my first choice for cherry pie because their bright, tangy flavor balances the sugar and gives you that classic sweet-tart filling. Look for varieties such as Montmorency, Morello or Amarelle.
Can’t find tart cherries? Don’t let that stop you! Sweet cherries like Bing work too. Because they’re naturally sweeter, you may want to reduce the sugar slightly depending on the sweetness of your fruit.
How to Pit Cherries
A cherry pitter is 100% worth it if you’re working with several cups of cherries. My kids love helping with this job too, so it’s an easy way to get the kiddos involved.
No cherry pitter? Push the pit through the cherry with a chopstick or the narrow end of a piping tip.
Can I Use Frozen or Canned Cherries?
Yes! Fresh, frozen or canned cherries can all work for cherry pie, which means you aren’t limited to making this recipe during cherry season.
Fresh cherries: Pit them and use them as directed in the recipe.
Frozen cherries: Thaw them first and drain off excess liquid before making the filling. This is my favorite option when I’m making cherry pie for Thanksgiving or Christmas.
Canned cherries: Drain them very well before combining them with the remaining filling ingredients. Be sure you’re using canned cherries rather than prepared cherry pie filling.
No matter which you choose, pay attention to how sweet your cherries are and adjust the sugar if needed.

How to Make Cherry Pie
Homemade pie takes a little time, but none of the individual steps are difficult. Here’s the whole process:
- Prepare the crust: Make the pie dough, roll out the bottom crust and place it in your pie plate.
- Make the cherry filling: Add the cherries, sugar, lemon, almond extract and thickener to a saucepan. Cook just until the cherries begin releasing their juices.
- Fill the pie: Spoon the cherry filling into the prepared bottom crust.
- Add the lattice: Roll out the remaining dough, cut it into strips and weave them over the filling. Crimp the edges.
- Finish the crust: Brush the lattice with the egg and milk mixture and sprinkle with sanding sugar.
- Bake: Bake until the crust is golden brown and the cherry filling is hot and bubbling. Tent the crust with foil if it starts getting too dark.
- Cool completely: This part is important! Let the pie cool, then refrigerate it for a few hours so the filling has time to fully set.
How to Make a Lattice Pie Crust
A lattice looks fancy, but it’s just an over-under pattern!
- Roll the top pie crust into a circle and cut it into even strips.
- Lay half of the strips across the pie in one direction.
- Fold every other strip halfway back.
- Lay one new strip across them in the opposite direction and unfold the strips.
- Fold back the alternating strips and add another crosswise strip.
- Continue weaving until the pie is covered, then trim and crimp the edges.
Don’t worry about making it perfect. Once it’s golden brown and bubbling with cherry filling, no one is looking for perfectly straight strips!

Tips for the Best Cherry Pie
Taste your cherries first. Sweetness varies tremendously, so tart cherries may need more sugar than sweet cherries.
Keep the pie dough cold. Cold butter is one of the secrets to a flaky crust.
Don’t pull the pie too early. Look for a deeply golden crust and filling bubbling through the lattice.
Protect the crust if necessary. If the edges brown before the filling is done, loosely cover them with foil.
Bake on a sheet pan. Fruit pies love to bubble over, and I’d much rather wash a baking sheet than the bottom of my oven!
Cherry Pie Troubleshooting
The most common causes are underbaking or slicing the pie too soon. The filling should be visibly bubbling before you remove the pie from the oven. Then let the pie cool completely so the thickener has time to set the juices.
Too much thickener or not enough cherry juice can create a filling that’s more firm than saucy. Measure the thickener carefully and remember that the filling will continue to thicken as the pie cools.
Excess liquid from the cherries can soak into the crust. Drain thawed frozen or canned cherries well, don’t let the assembled pie sit around too long before baking and make sure the pie is fully baked.
The exposed edges brown faster than the center. Loosely cover them with aluminum foil or a pie shield and continue baking until the filling is bubbling.
That’s actually not unusual with juicy fruit pies! Don’t overfill the pie plate and bake it on a parchment-lined baking sheet to catch any drips.

Can I Make Cherry Pie Ahead of Time?
Absolutely! Cherry pie needs plenty of time to cool and set, which makes it perfect for making ahead. Bake it the day before, let it cool completely and store it covered until you’re ready to serve.
If you prefer your pie slightly warm, gently reheat it before serving.
Can You Freeze Cherry Pie?
Yes! You can freeze cherry pie before or after baking for up to 3 months.
For an unbaked pie, assemble the pie completely, then wrap it tightly in plastic wrap followed by foil. Bake it from frozen rather than thawing it first, adding extra baking time as needed.
For a baked pie, cool it completely before wrapping and freezing. Let it thaw before serving, or warm it gently in the oven if you prefer your cherry pie warm.

This cherry pie recipe is proof that fruit pie deserves a spot on the table all year long. Between that flaky, buttery homemade crust and the juicy sweet-tart cherry filling, I will happily choose a slice over just about any dessert! Use fresh cherries all summer, frozen cherries for Thanksgiving and Christmas, and don’t forget the big scoop of vanilla ice cream on top. Pie girl forever.
More Homemade Pie Recipes
REMEMBER TO SUBSCRIBE TO our FREE Oh Sweet Basil NEWSLETTER AND RECEIVE EASY RECIPES DELIVERED INTO YOUR INBOX EVERY DAY!
When you try a recipe, please use the hashtag #ohsweetbasil on INSTAGRAM for a chance to be featured in our stories! FOLLOW OH, SWEET BASIL ON FACEBOOK | INSTAGRAM | PINTEREST | TWITTER FOR ALL OF OUR LATEST CONTENT, RECIPES AND STORIES.