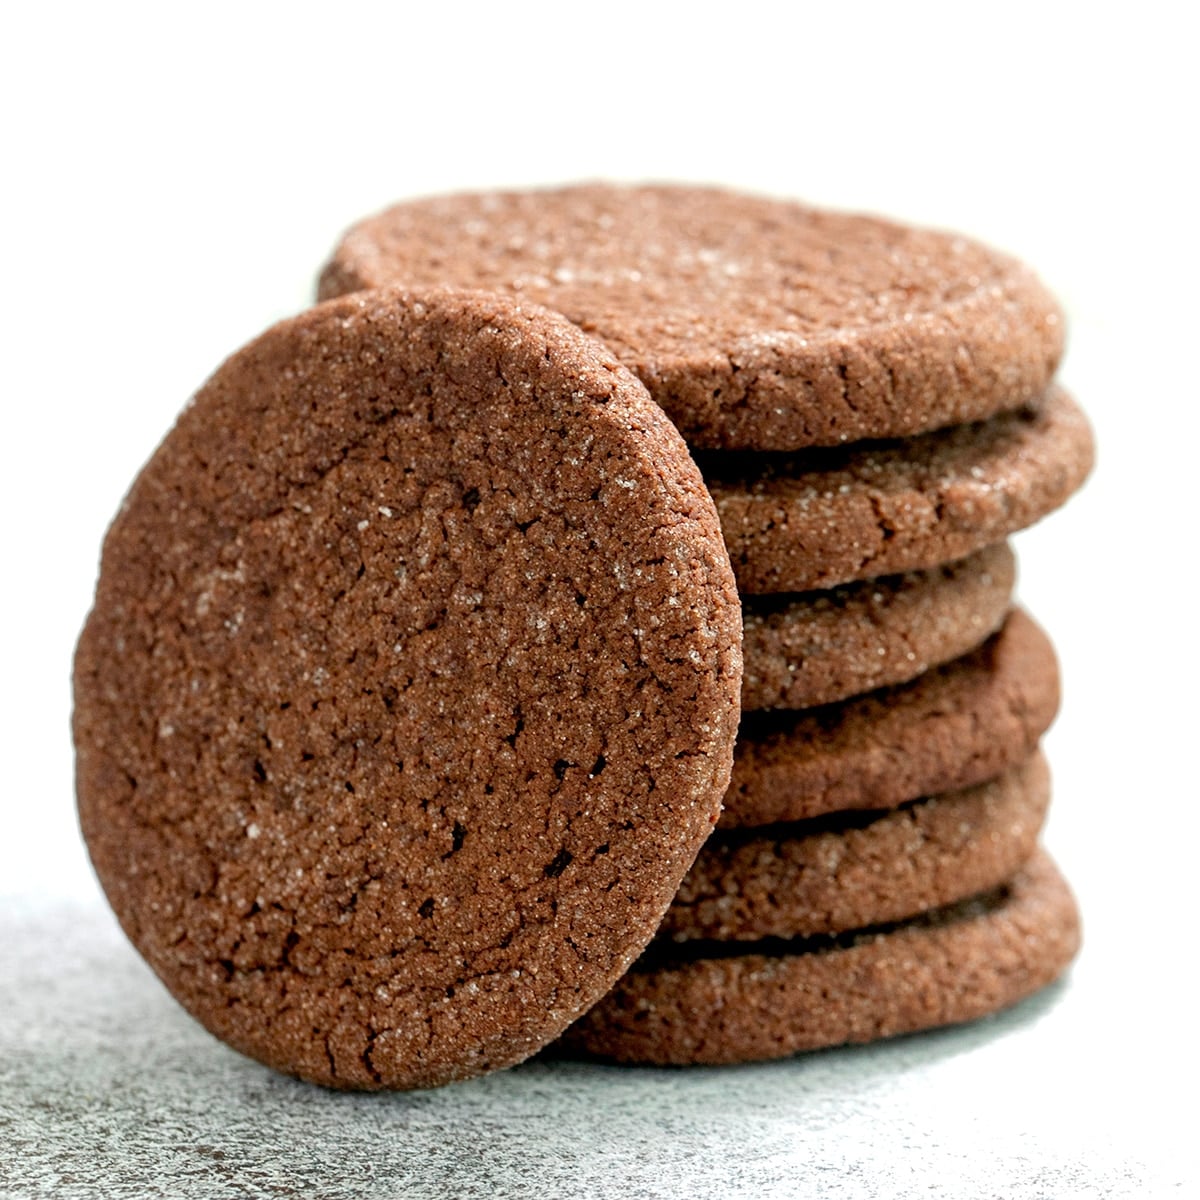
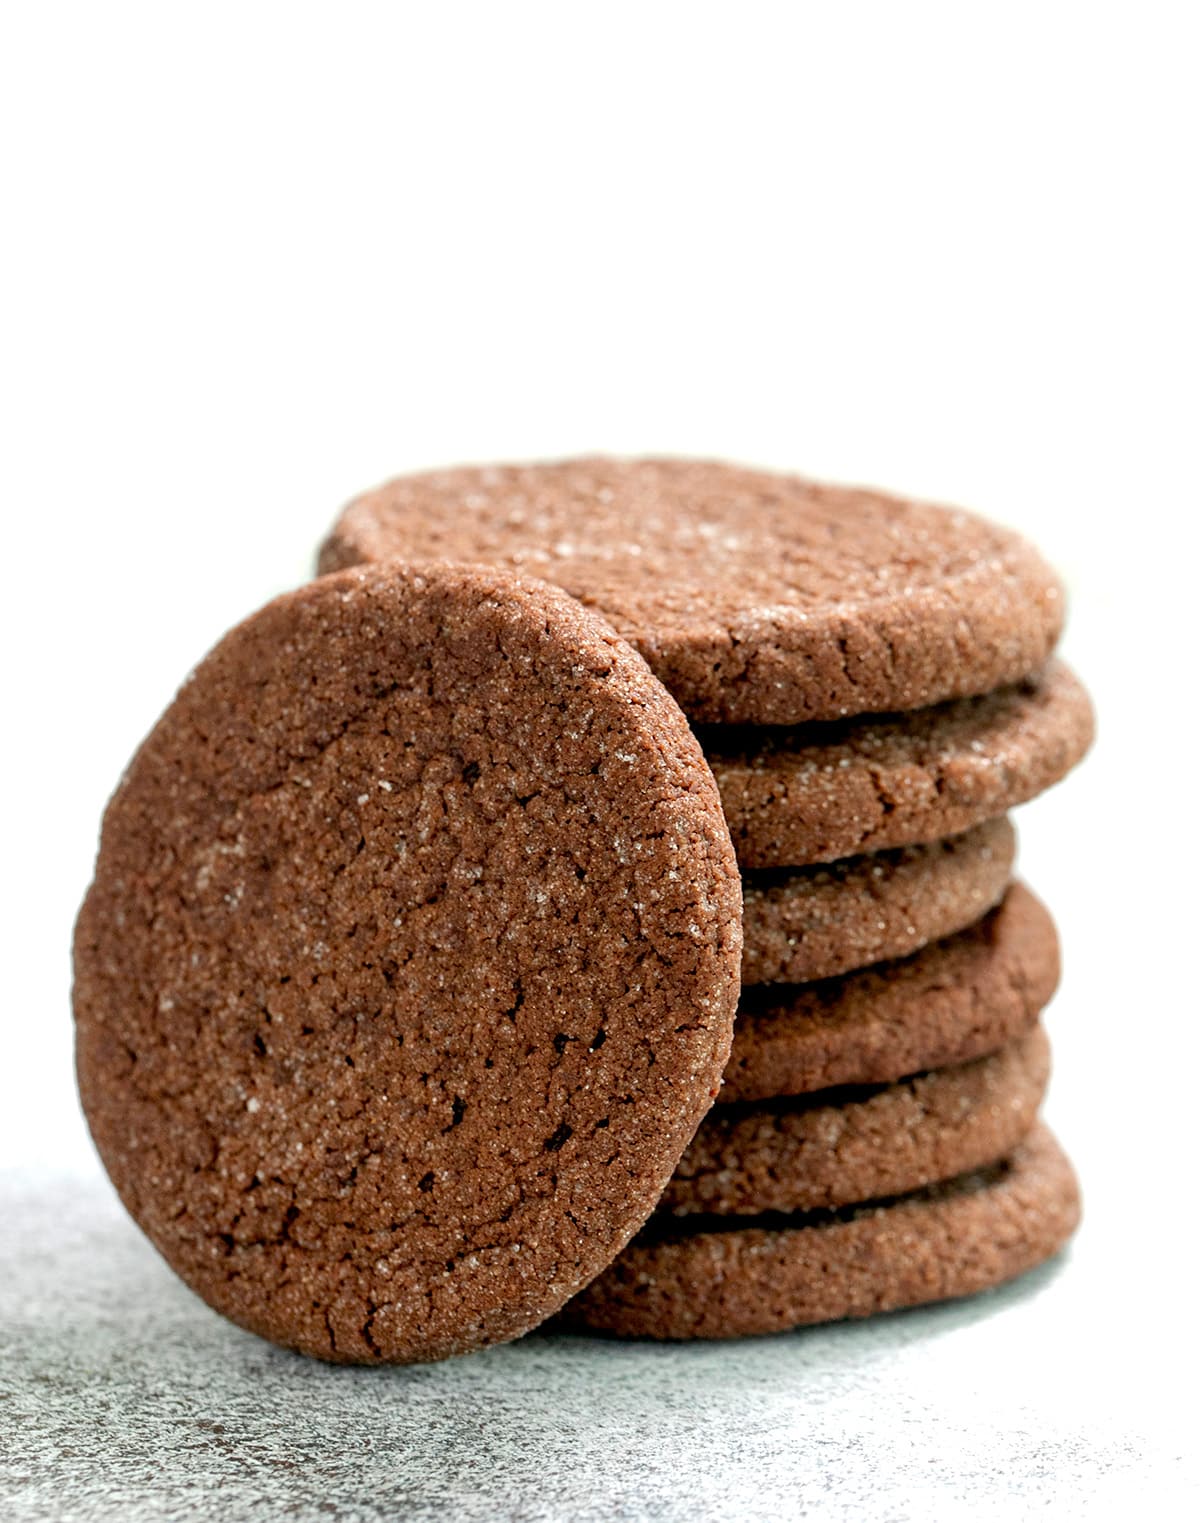
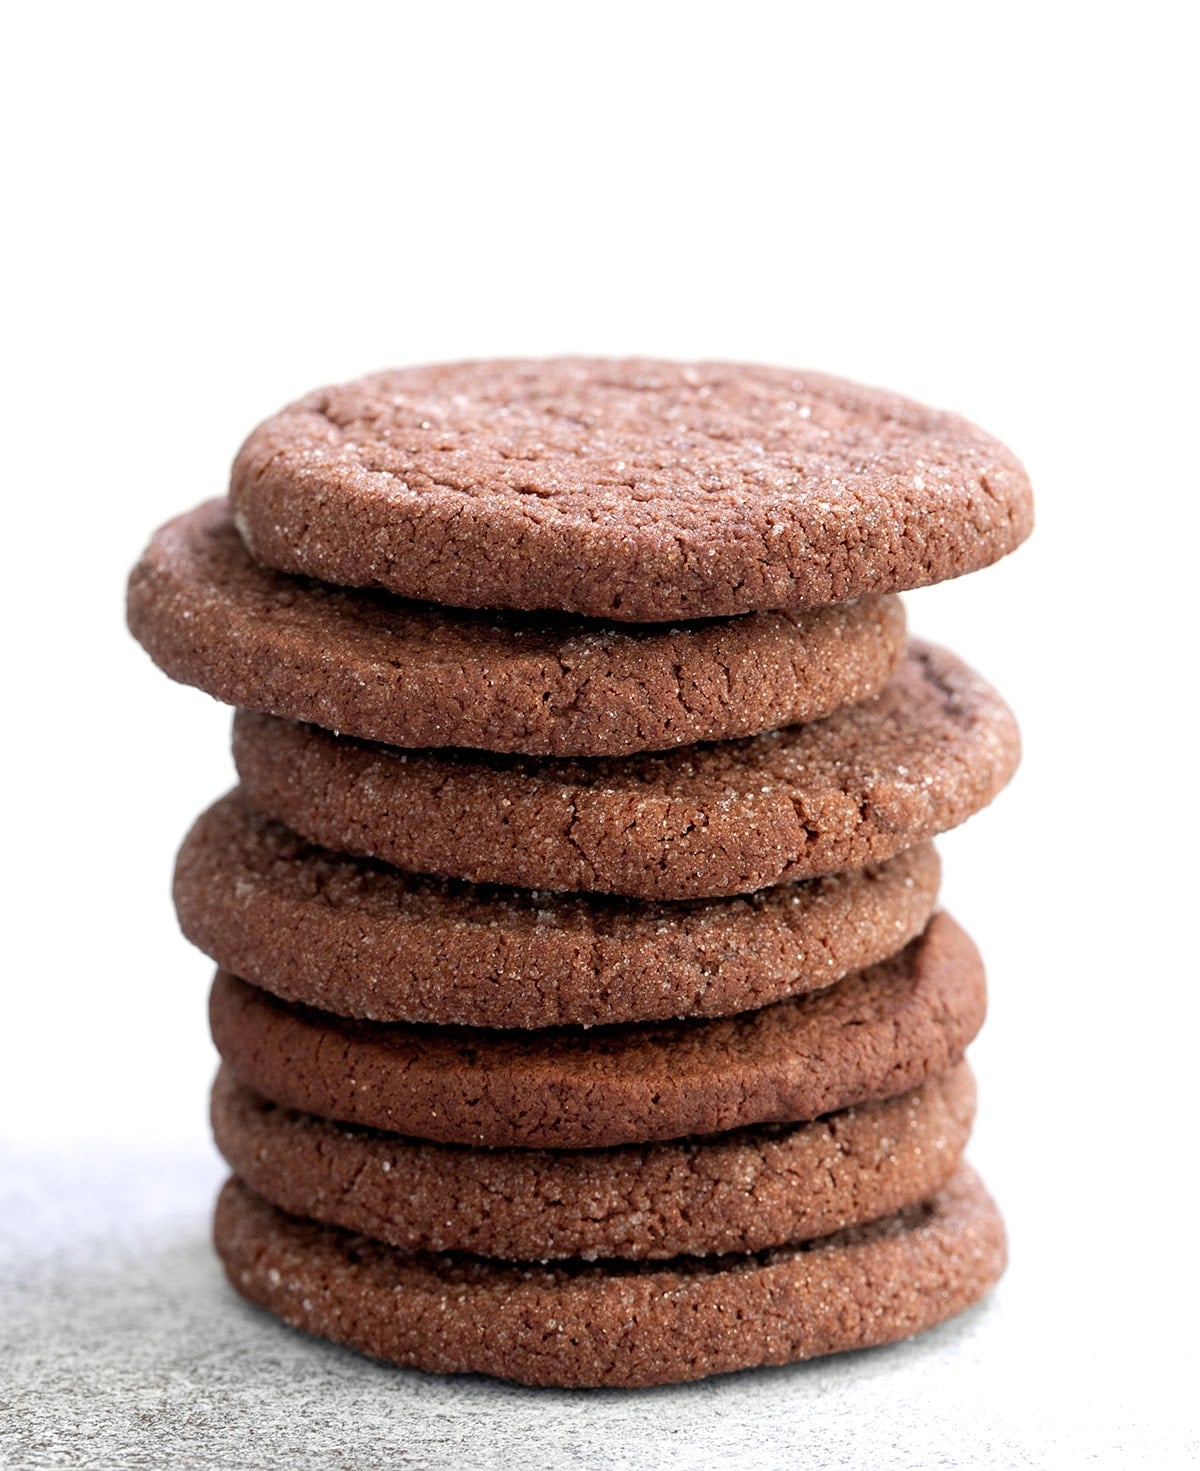
These soft, chewy gluten free chocolate cookies have all the richness of brownies in a simple slice-and-bake cookie. With a combination of cocoa powder and melted chocolate melted baked right in, they taste like they came from your favorite bakery. For chocolate lovers only!
Why this recipe works
These cookies are so rich and brownie-like because they’re made with cocoa powder, melted chocolate, and a touch of molasses. In combination, they add deep chocolate flavor and the perfect chewy texture.
Dipping the raw, shaped cookie dough in a little extra granulated sugar gives them a slight sugary crunch on the outside. It won’t make them sparkle like coarse sugar would, but adds some texture and sweetness, and makes them a bit sturdier.
These aren’t a chocolate version of chocolate chip cookies, or gluten free double chocolate chip cookies. Those are absolutely delicious, but are not nearly as rich and brownie-like as these cookies.
Recipe ingredients
Here’s what you’ll need to make these cookies, plus a few words about the role each plays in the perfect rich, soft chocolate cookies:
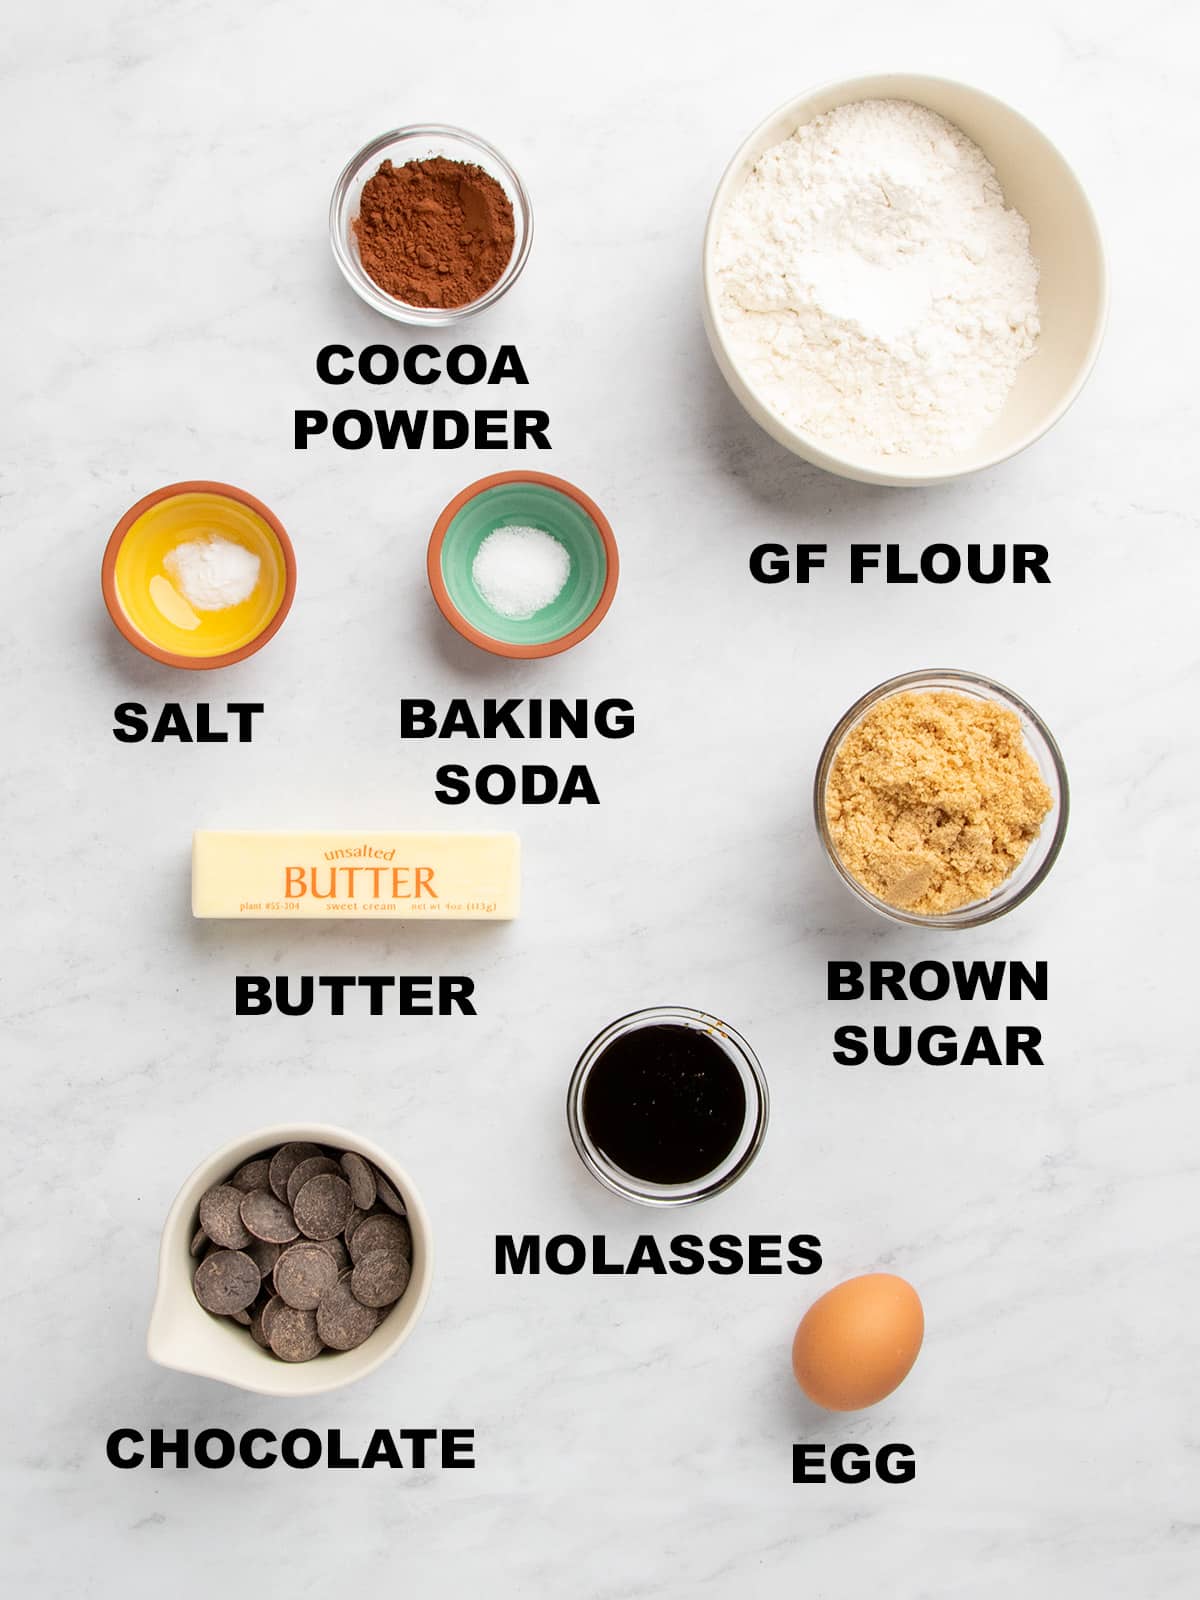
- Gluten free flour: Provides foundational structure to bind the fat, sugar and moisture into a cookie that spreads evenly and not too much. You need a blend with a superfinely ground rice flour base like Better Batter’s original all purpose gluten free flour blend without more xanthan gum, Nicole’s Best multipurpose with added xanthan gum, or Bob’s Red Mill 1-to-1 in the blue bag.
- Cocoa powder: Adds chocolate flavor and richness, only adding a minimal amount of fat compared to melted chocolate, so it helps the cookies maintain their shape and structure. Dutch-processed cocoa powder makes a richer result, but natural cocoa powder works fine, too.
- Chocolate: Adds depth of chocolate flavor and a fudgy, brownie-like density. Be sure to use baking chocolate that is made for melting, with flavor you like. Avoid chocolate chips which contain added wax to help them hold their shape in the oven, but melting disks are fine.
- Unsulphured molasses: This sticky, brown liquid made from mature sugar cane deepens and enriches the flavor of the chocolate, and helps make the cookies tender.
- Brown sugar: Adds sweetness, a bit of extra molasses for chewy texture and depth of flavor, and locks in moisture for tender, chewy cookies.
- Butter: Adds buttery flavor and fat for richness, and helps bring the cookie dough together by adding moisture. It also helps the cookies spread in the oven.
- Egg: Add some rise and provides structure to help the cookies hold their shape as they cool.
- Baking soda: Reacts with the acid in molasses to create some rise, and neutralizes any acidity if you’re using natural cocoa powder.
- Salt: Brightens the other flavors and balances sweetness.
How to make gluten free chocolate cookies (step x step photos)
This visual overview should help you imagine how to make these cookies in your own kitchen. See the recipe card below for full ingredient amounts:
Melt chocolate and butter
Place chopped butter and melting dark chocolate in a heat-safe bowl. Melt them together gently by placing over a simmering pot of water or microwaving at 50% power in 30-second bursts, stirring frequently. Melting the chocolate gently keeps it from breaking the emulsion into unmanageable clumps or burning it.
Add other wet ingredients
Once the chocolate mixture is no longer hot to the touch so it doesn’t scramble the egg, whisk in molasses brown sugar and an egg until smooth. Make sure everything is smooth and glossy so the sugar is dissolved and the egg fully integrated.
Whisk dry ingredients
In a large mixing bowl, whisk together gluten free flour including xanthan gum, cocoa powder, salt, and baking soda. Cocoa powder tends to resist combining with liquid, so whisking it thoroughly will disperse through the flour blend and avoid any clumps of leavener.
Combine wet and dry
Make a well in the center of the dry ingredients to make it easier to mix in the wet. Pour the chocolate and butter mixture in, and mix until fully combined. Since the wet ingredients are still warm, the cookie dough will be very soft.
Shape the dough into a log
Place a large sheet of parchment paper on your work surface, and scrape the soft dough into a loose log on top about 2-inches in diameter and 8-inches long. Wrap the paper around the dough and rock the dough gently back and forth to help round it a bit.
Squeeze the dough along the length to avoid any gaps toward the center of the dough, then cinch the ends so the dough doesn’t dry out.
Chill the cookie dough
Place the log of dough on a flat surface in the refrigerator and chill for about 1 hour, or until firm enough to slice but not so so hard that you can’t slice through it.
Slice the dough
Once the log is chilled enough, you should be able to slice it with a sharp knife without splintering the dough. If it’s too firm to slice, allow it sit at room temperature until you can slice it but it’s still firm. Slice by cross-section every 1/2-inch for 16 rounds.
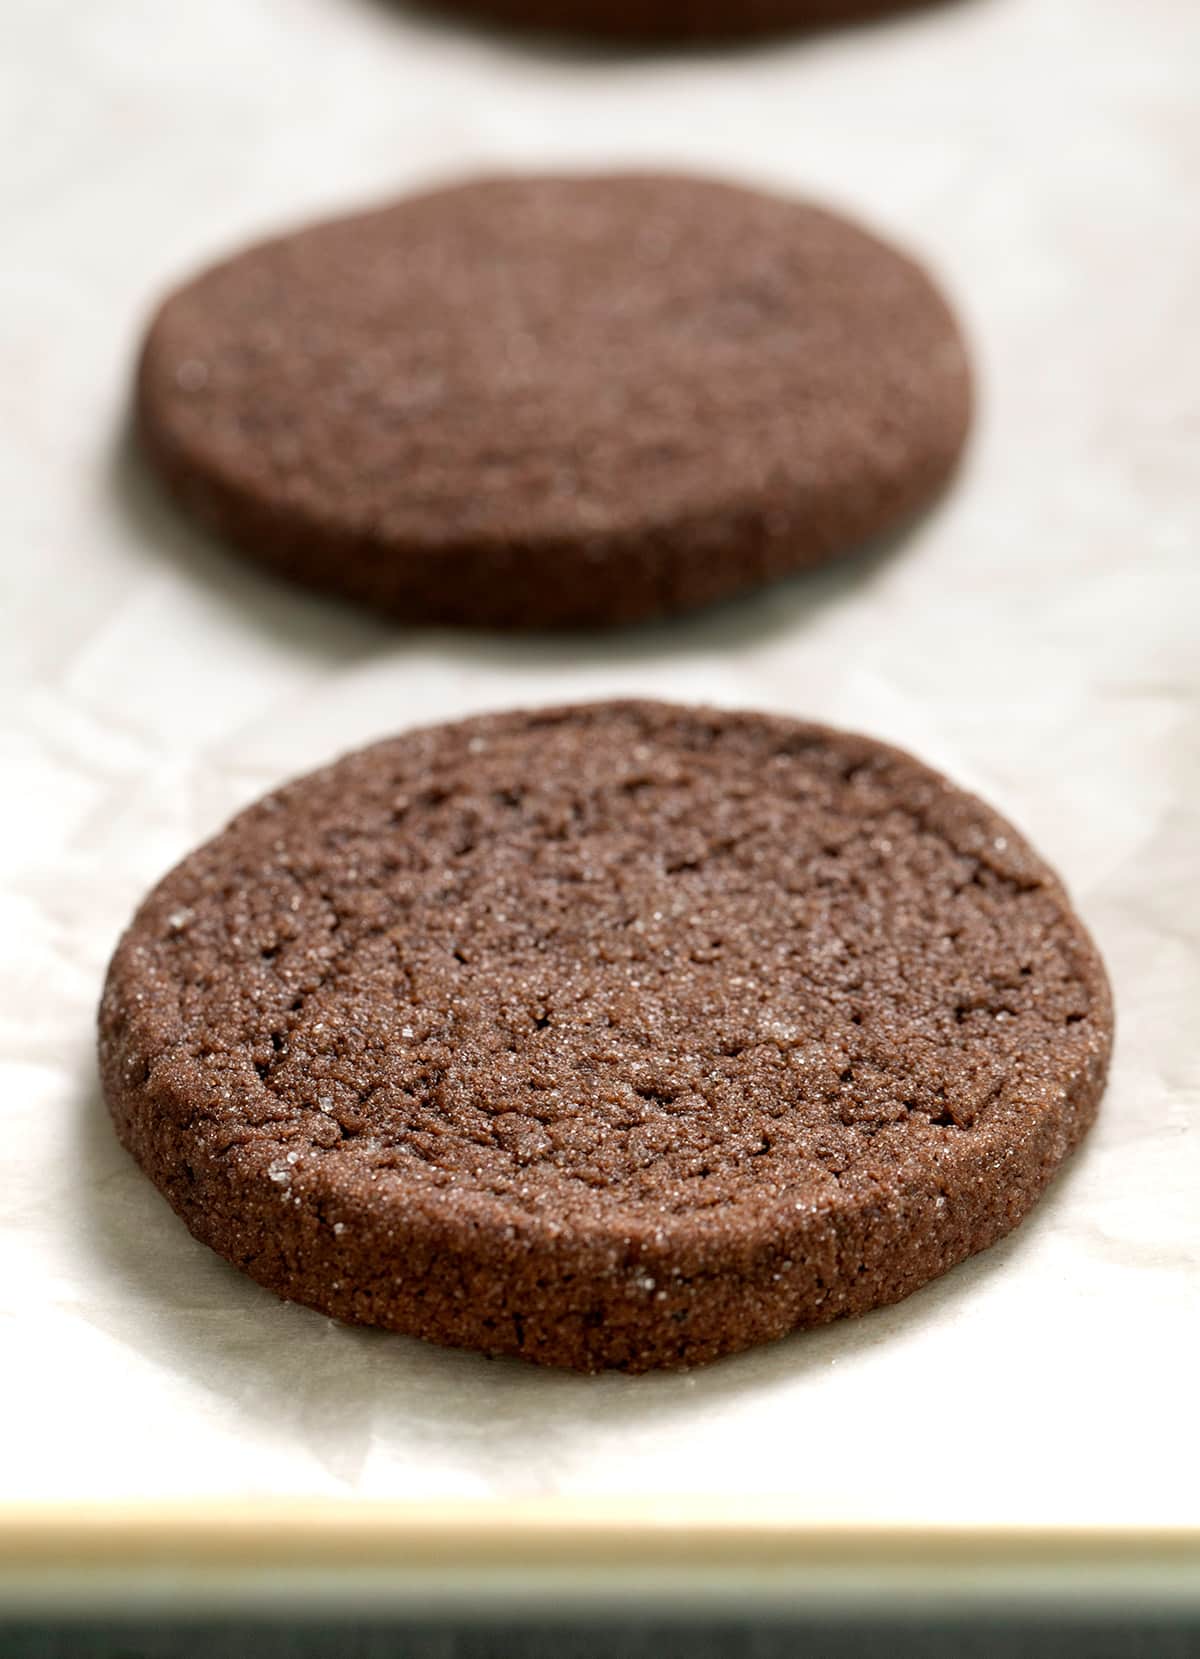
Reshape and decorate
Slicing the dough will inevitably flatten the bottom a bit. Place a flat side of each disk in the palm of your hand and squeeze to force it back into a smooth round.
Press top, bottom and sides of each disk into a shallow bowl of granulated sugar. It should stick easily unless the dough is super cold.
Bake
Place the prepared raw cookie slices about 2 inches apart on a parchment-lined baking sheet to allow them room to spread during baking. Bake at 325°F for about 12 minutes, or until spread about an inch on all sides and they don’t glisten wet in the center.
“Scoot” as needed
If the cookies have spread unevenly, coax each back into shape while they’re hot out of the oven by placing a 3 1/2-inch cookie cutter on top. Move the cutter around in circles to tuck any uneven edges under the cookie.
Allow them to cool on the baking sheet or they’ll fall apart. Once cool, they’re very stable.
Expert tips
Don’t chill too long
If you’ve chilled the log of uncut dough for too long, you won’t be able to slice it without its splintering into irregular pieces. Just let it sit at room temperature until it’s soft enough to slice.
For round cookies
It’s impossible to make the perfect round cylinder that you slice into ideal rounds right away. Luckily, after slicing the log, you still get 2 chances to shape the disks into smooth rounds.
First, when raw, place each slice flat in the palm of your hand and squeeze gently all around. This also ensures that there’s no gap in the center of the cookie. Second, after baking, tuck under any irregular edges of the hot, just-baked cookies under by moving a plain round cookie cutter around each in circles.

Ingredient substitutions
Dairy free
To replace the butter, try block-style vegan butter like Melt or Miyoko’s brand. Plus, make sure the bittersweet chocolate you use is dairy-free, too. The darker the chocolate, the more likely it is to be dairy free, but always check.
Egg free
To replace the egg, try a “chia egg” substitution, JustEgg refrigerated liquid egg replacer, or Bob’s Red Mill egg replacer. Even a flax egg, which tends to have a strong color and flavor, should be fine since the chocolate flavor is quite strong.
Molasses
If you don’t have molasses,try honey or Lyle’s Golden Syrup in its place. Instead of light brown sugar, though, I’d recommend using dark brown sugar to replace the flavor.
Storage instructions
Once they’re cooled, these cookies can be stored in a sealed glass container at room temperature for up to 5 days and they should retain their texture.
For longer storage, freeze the cookies in tightly-sealed freezer-safe zip-top plastic bags. Remove as much of the trapped air as possible to avoid freezer burn. They should stay fresh that way for up to 3 months. They won’t freeze solid, so you can eat them right out of the freezer, or defrost at room temperature.
-
In a medium-size, microwave-safe bowl, place the chopped chocolate and chopped butter.
-
Melt in a double boiler or in the microwave in 30-second bursts at 50% power, stirring until smooth. Allow the mixture to cool briefly.
-
To the melted butter and chocolate, add the molasses, brown sugar, and egg. Mix to combine, and set the bowl aside.
-
In a large mixing bowl, place the flour, xanthan gum, cocoa powder, salt, and baking soda, and whisk to combine well.
-
Create a well in the center of the dry ingredients, and add the chocolate mixture. Mix to combine. The dough will be very soft.
-
Transfer the dough to a large piece of unbleached parchment paper. Shape the dough into a cylinder about 2-inches in diameter and about 8-inches long along the length of the parchment paper.
-
Roll the paper tightly, cinching the ends to seal.
-
Place the cylinder of dough in the refrigerator until firm enough to slice (at least 1 hour).
-
Once the dough has chilled enough to be sliced, preheat your oven to 325°F. Line large rimmed baking sheets with unbleached parchment paper and set them aside.
-
Remove the chilled cylinder of dough from the refrigerator and unwrap it. Rock the cylinder back and forth on a flat surface to round out any flattened edges.
-
Using a large, sharp knife, attempt to slice the cylinder at the very end. If it’s too difficult to slice without splintering the dough, let it sit until it’s sliceable but still firm.
-
Slice into 1/2-inch thick disks by cross-section. You should get about 16 cookies.
-
Cup each slice separately in your palm to reshape any rounds that have become misshapen during slicing.
-
Place the (optional) granulated sugar in a small bowl. Dip each of the raw cookie disks in the sugar, pressing gently to coat on all sides.
-
Place the disks of dough about 2 inches apart on the prepared baking sheets. They will spread during baking.
-
Place the baking sheets, one at a time, in the center of the preheated oven for 12 minutes, or until the cookies are spread about 3 inches in diameter and don’t seem shiny wet in the center.
-
Allow to cool completely on the baking sheet before serving. If you attempt to move the cookies before they are cool, they will fall apart but will be stable once set.
This recipe works best with Better Batter’s original all purpose gluten free flour blend, Nicole’s Best multipurpose with added xanthan gum, or Bob’s Red Mill 1-to-1 in the blue bag. If you aren’t chilling the raw dough overnight before baking, add an extra ½ teaspoon xanthan gum to Nicole’s Best or an extra 1/4 teaspoon xanthan gum to Bob’s.
To make your own high-quality gluten free flour blend, check out my mock all purpose gluten free flour blends.
Serving: 1cookie | Calories: 187kcal | Carbohydrates: 26g | Protein: 1g | Fat: 9g | Saturated Fat: 5g | Polyunsaturated Fat: 0.4g | Monounsaturated Fat: 2g | Trans Fat: 0.2g | Cholesterol: 26mg | Sodium: 107mg | Potassium: 104mg | Fiber: 1g | Sugar: 16g | Vitamin A: 193IU | Calcium: 21mg | Iron: 1mg
Nutrition information is automatically calculated, so should only be used as an approximation.

Source link